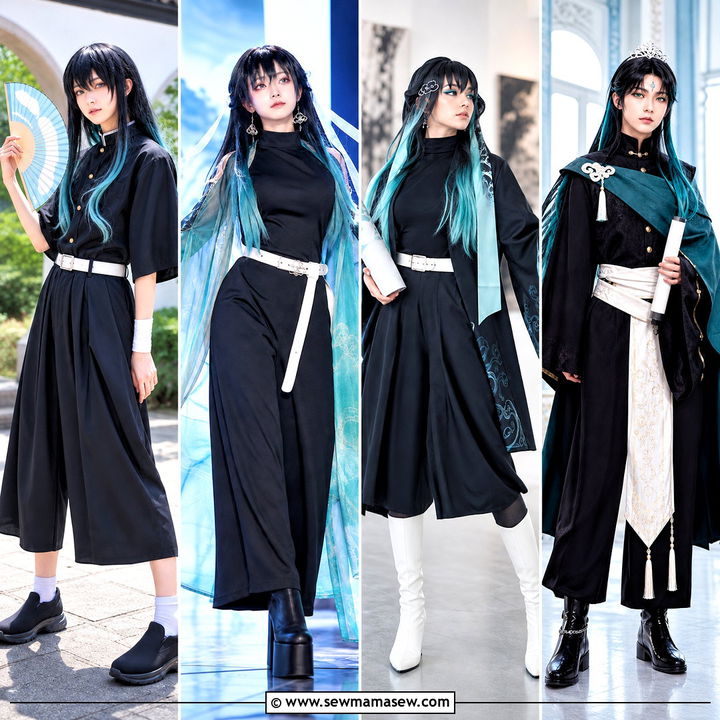
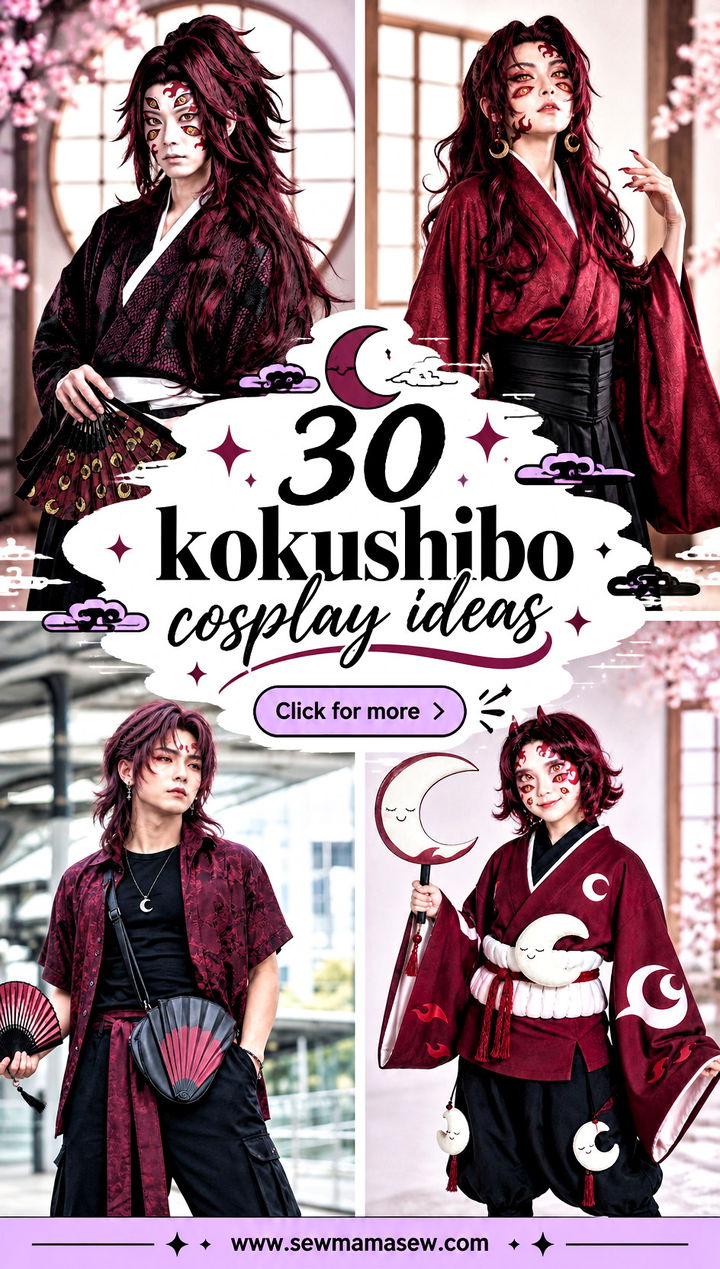
Kokushibo is one of those characters people recognize from the face first and the robe second, so the eyes tend to swallow all the planning time. I'd argue the opposite order. When I style him, the maroon-and-black colour story, the layered robe and a long, heavy wig do most of the work from across a hall, and the six-eye effect is the detail that rewards people who come closer. Face-safe eye appliqués handle that effect without specialty contacts, which I'd never suggest for a first attempt anyway. The 30 versions below run from a close anime build to closet pieces, formal tailoring and seasonal takes, and I've added notes on where each one tends to go wrong.
Placing Six Eyes Without Irritating Your Skin
Every version below relies on the extra eyes, so it's worth getting the method right once. I use printed or hand-drawn appliqués and a skin-safe cosmetic adhesive, and I patch-test the adhesive on the inside of my wrist the day before. If it itches or reddens, it won't behave any better near your eyes.
- Start on clean, oil-free skin. Moisturizer underneath is the main reason appliqués slide off by afternoon.
- Mark the placement with tiny dots of eyeliner in a mirror. Lining the upper pair with your brow arch and the lower pair with your cheekbone keeps the face symmetrical.
- Apply a thin layer of adhesive, wait until it turns tacky, then press each appliqué down for a slow count of ten.
- Blend the edges with your pale base and set with translucent powder so the paper edge disappears.
- Keep everything well away from the lash line and the inner corner of the eye.
For removal, I soak each appliqué with an oil-based makeup remover and wait until it lifts on its own. Peeling one off dry pulls at the thin skin around the eyes, and that's the step people regret the next morning.
A Waist-Length Wig That Survives the Day
Long synthetic wigs tangle where the hair rubs against the robe, mostly at the back of the neck and the shoulders. I brush from the ends upward with a wide-tooth comb, never from the roots down, and a light mist of wig detangler cuts the static that makes fibres knot. If your wig sheds, give it a firm comb over a sink before the event; most of the loose fibres come out in the first session.
Heat-resistant fibre lets you set the waves with a low-heat tool, but test a hidden strand first, because some fibres frizz or melt well below the setting on the box. At the event, a few wig clips sewn into the cap at the temples hold the weight of all that length better than pins alone.
1. Anime Accurate Kokushibo Cosplay
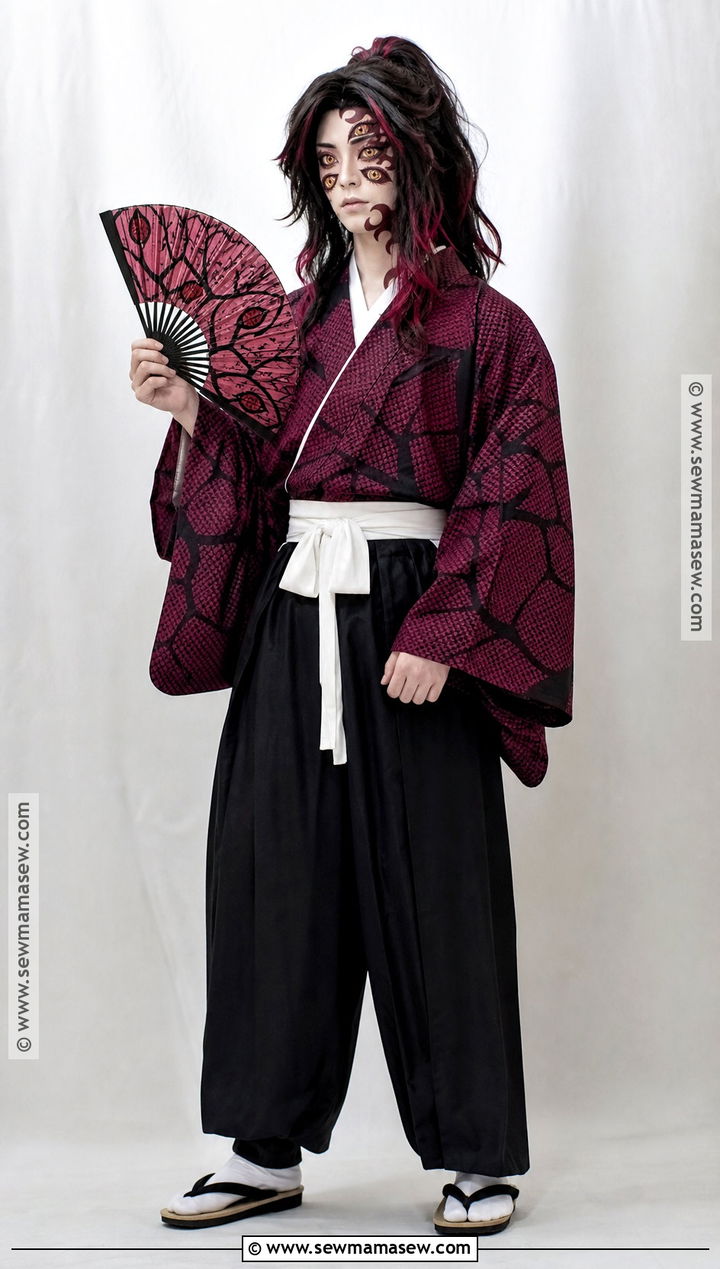
This is the build to aim for if you want fans to name him before you're close enough to see the eyes. A deep maroon kimono with black branching or flame-like patterns goes over loose black hakama, and a wide dark obi gives the waistline that crisp shape. For the wig, look for one that blends black, burgundy and plum fibres; a single flat colour reads like a party-store wig under convention lighting. Pale matte foundation, angular contour, the red markings and four eye appliqués around your own eyes carry the face. Tabi socks and flat sandals finish the traditional base. I swap the sword for a folding fan painted with crescent moons, because it keeps the moon theme and gets past prop checks without a conversation.
2. Manga Black And White Kokushibo Cosplay
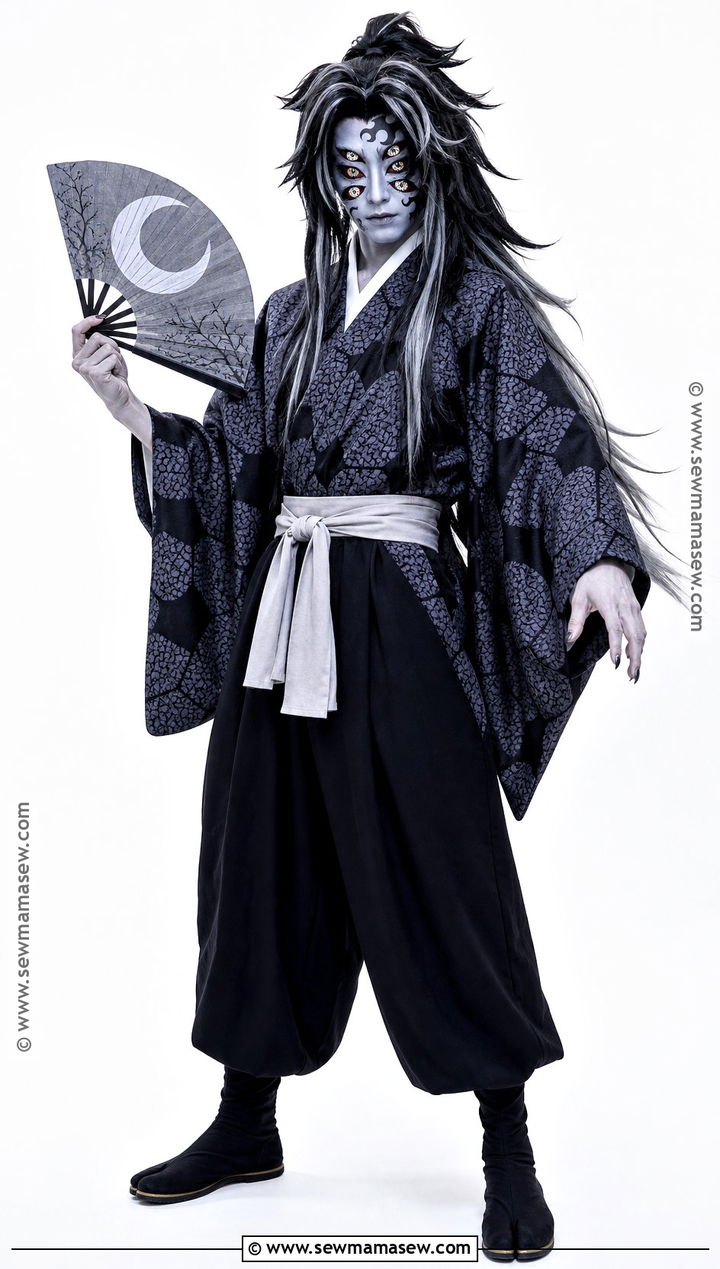
Going fully grey turns him into a manga panel, and it's the version I'd suggest to anyone who struggles to find the right maroon. A charcoal kimono printed with black organic lines over wide black trousers, plus a pale grey obi instead of a coloured sash, keeps everything in one value range. Blend black, silver-grey and charcoal in the wig and let it fall below the waist. The makeup is where monochrome gets tricky: white face paint can look chalky in photos, so I lean toward a light grey base with cool contour on the cheekbones. Grey, black and white eye appliqués, darkened brows and grey markings add contrast, with split-toe shoes or cloth boots and a monochrome crescent fan at the end.
3. Easy Kokushibo Closet Cosplay
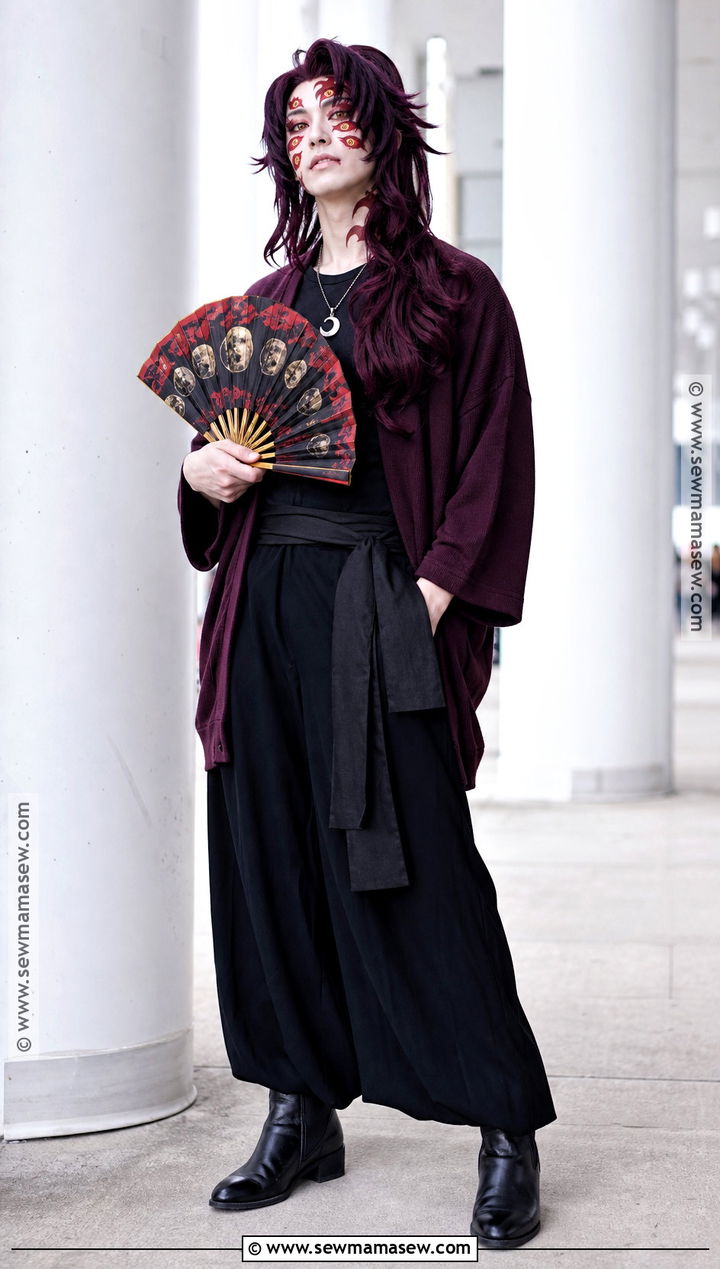
Short on time? A burgundy wrap cardigan over a fitted black shirt and loose black pants gets surprisingly close, especially once a wide black fabric belt pulls the cardigan into a kimono-like wrap. Black ankle boots replace sandals. The wig carries this version, so if you only buy one thing, buy a long burgundy one; temporary plum colour is fine if your own hair is already long and dark. Keep the face simple with pale foundation, sharp brows, red liner and four small printed eye stickers above and below your eyes, plus minimal red markings in cosmetic liner. Crescent-moon earrings and a lightweight black fan with silver moons round it out for very little money.
4. DIY Kokushibo Kimono Cosplay
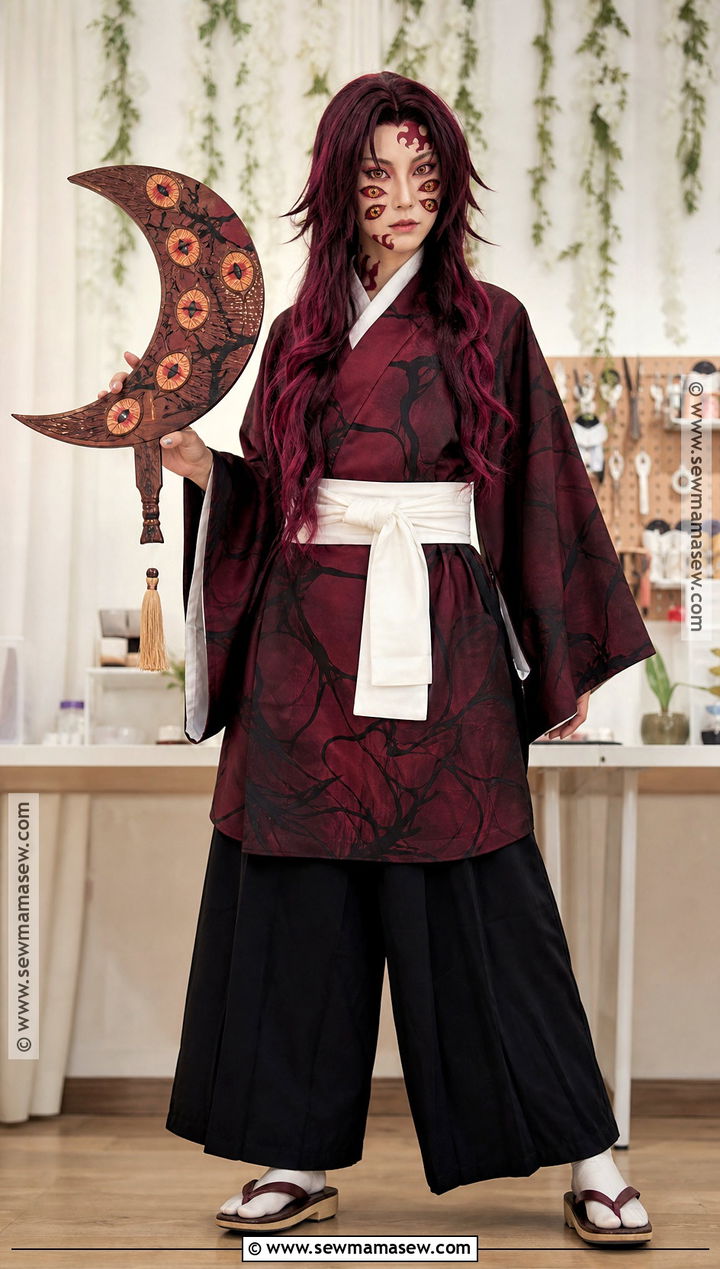
Making the robe yourself is how you get the pattern placement right, and it's easier than it sounds. I start from a plain burgundy wrap robe or a thrifted kimono-style garment and slide cardboard between the layers before painting, because fabric paint bleeds straight through to the back panel otherwise. Flexible fabric paint matters here: stiff craft acrylic cracks along the sleeve folds after one wear. Pair the robe with loose black pants, a wide obi, tabi-style socks and flat sandals, and style a long plum wig with soft waves and a clean centre part. Pale makeup, reddish contour, markings and printed appliqués handle the face, with setting spray to hold them through the day. A wooden folding fan with crescent shapes and dark red ribbon takes one afternoon to customize.
5. Budget Kokushibo Cosplay
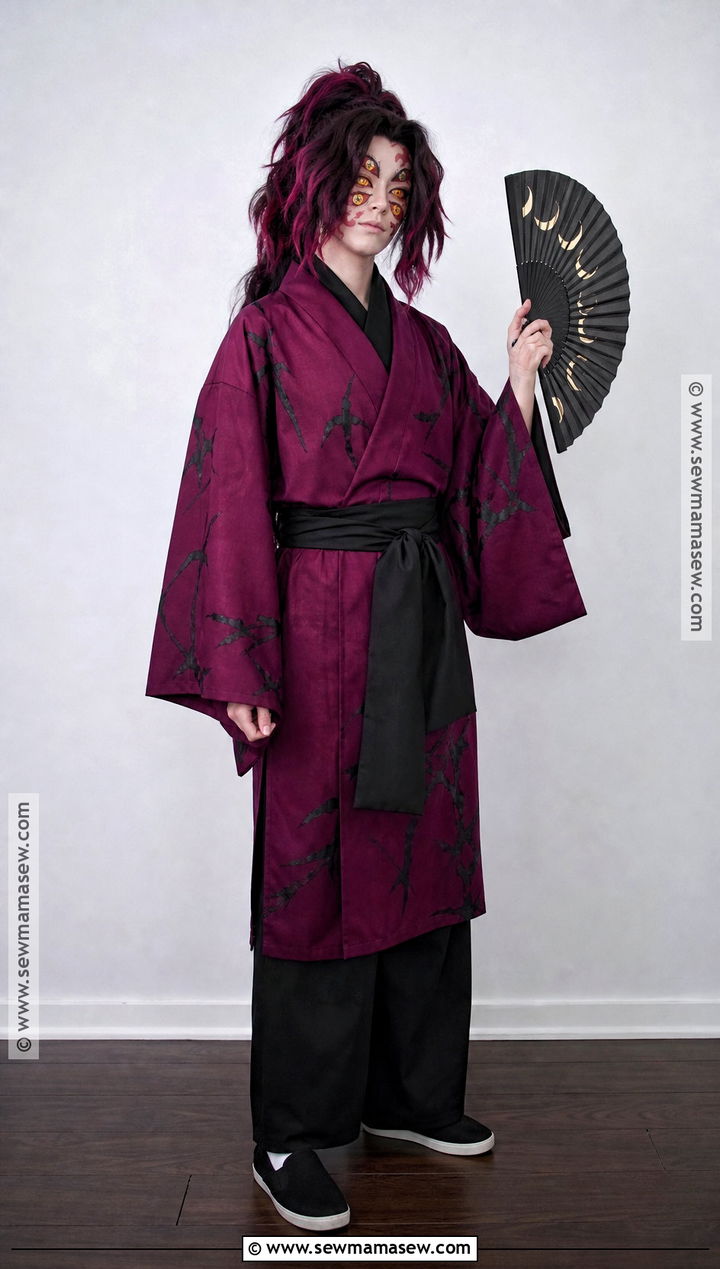
A small budget is no reason to skip the character. A burgundy bathrobe, black pajama pants and a wide belt from a thrift store make the base, and diluted black fabric paint gives you irregular branch patterns that actually look better slightly uneven. Cheap black slip-ons stand in for specialty shoes. With a basic red-purple wig, I trim the front into face-framing layers myself rather than paying for a styled one; cut a little at a time with the wig on a head form, since synthetic fibre doesn't grow back. Hand-drawn eyes on makeup paper with cosmetic adhesive cover the six-eye effect. Keep every piece in the same two colours, because a consistent palette hides budget materials better than any single expensive item.
6. Beginner Kokushibo Cosplay
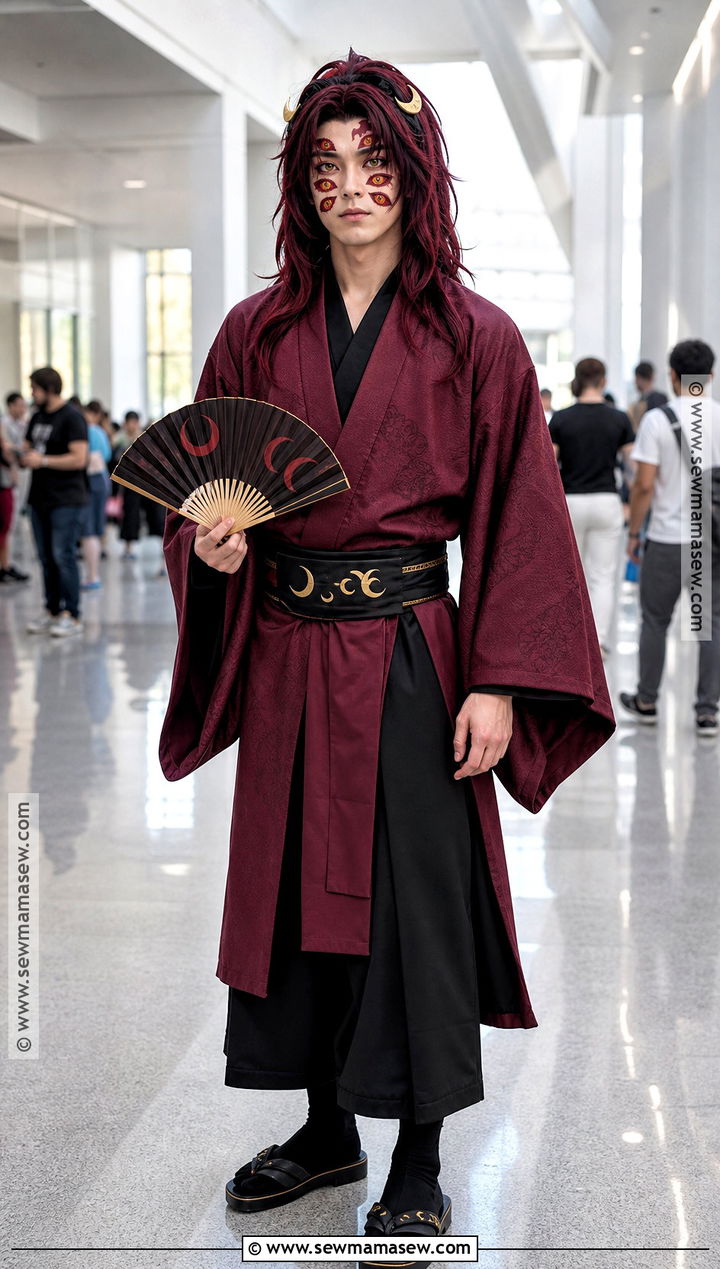
For a first cosplay, I'd buy the robe and spend your effort on fit and practice instead. A ready-made burgundy kimono robe with a simple black pattern over breathable black trousers and a fitted undershirt is plenty. A hook-and-loop obi is honestly the smartest beginner choice, since a tied obi slides loose within an hour if you haven't tied one before. Pick a heat-resistant wig and style only the centre part and front pieces; let the rest hang in loose waves. Everyday foundation instead of full face paint, cosmetic pencils for the markings and removable printed stickers for the extra eyes keep the face forgiving. Wear the whole thing at home for an hour before the event so you can fix the hem, wig grip and adhesive while it's quiet.
7. Kokushibo Cosplay With Six Eye Makeup
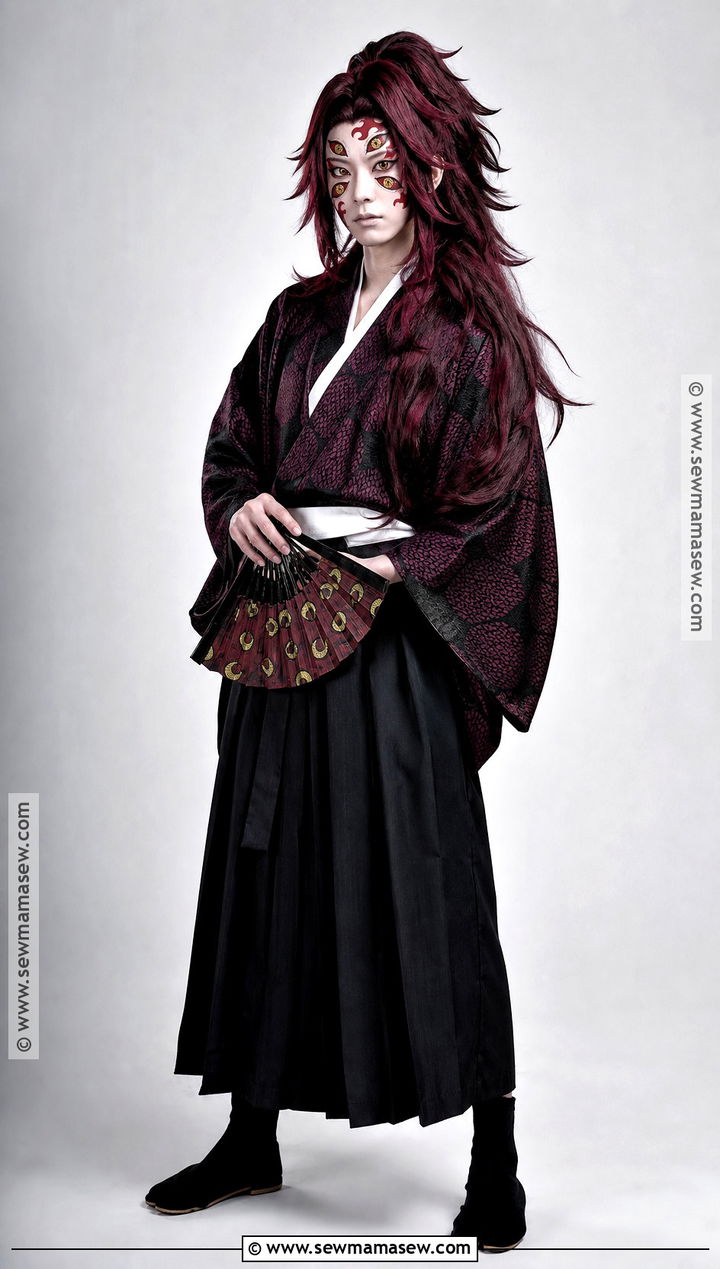
When the eyes are the star, everything else should step back. I keep the kimono to a dark maroon with understated black patterns, add loose hakama and a smooth black obi, and choose a waist-length burgundy wig that frames the face rather than covering it. Define your own eyes with red liner, then place two appliqués above and two below. Symmetry is the hard part: I mark the placement with tiny eyeliner dots in a mirror before any glue comes out. Keep adhesive well away from the lash line. Blend the edges with pale foundation, add the red markings, and keep jewellery minimal. Black tabi boots and a slim crescent fan are all the rest needs.
8. Kokushibo Cosplay With Face Mask
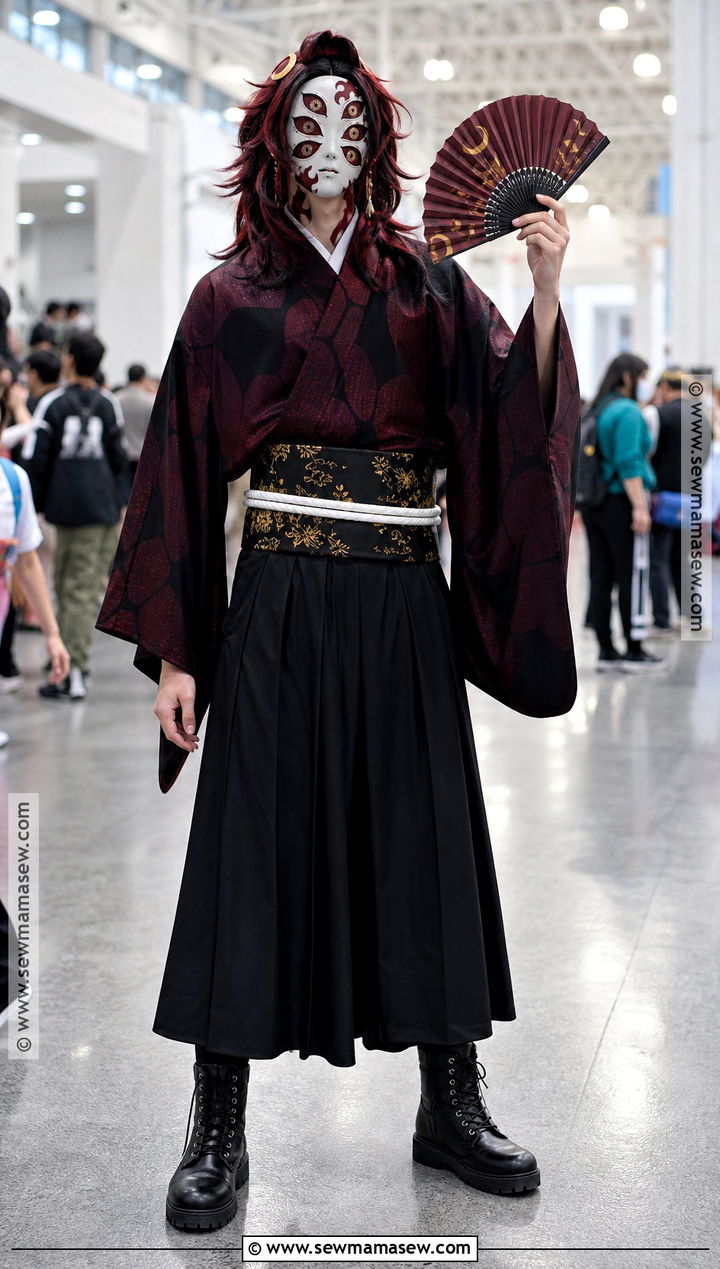
A printed half mask is the honest answer for anyone who hates long makeup sessions or has sensitive skin. Look for a lightweight one with the six-eye arrangement, pale colouring and red markings, and check the eye openings before buying, because masks narrow your side vision more than people expect. The rest is the familiar dark maroon kimono, wide black pants and a substantial obi, with a moisture-wicking shirt underneath. Layer the long burgundy wig over the mask edges so the join disappears. Flat boots beat sandals on long convention days. Crescent clips and a matching fan finish it, and the biggest perk is that you can take the face off at lunch.
9. Kokushibo Cosplay With Anime Mask
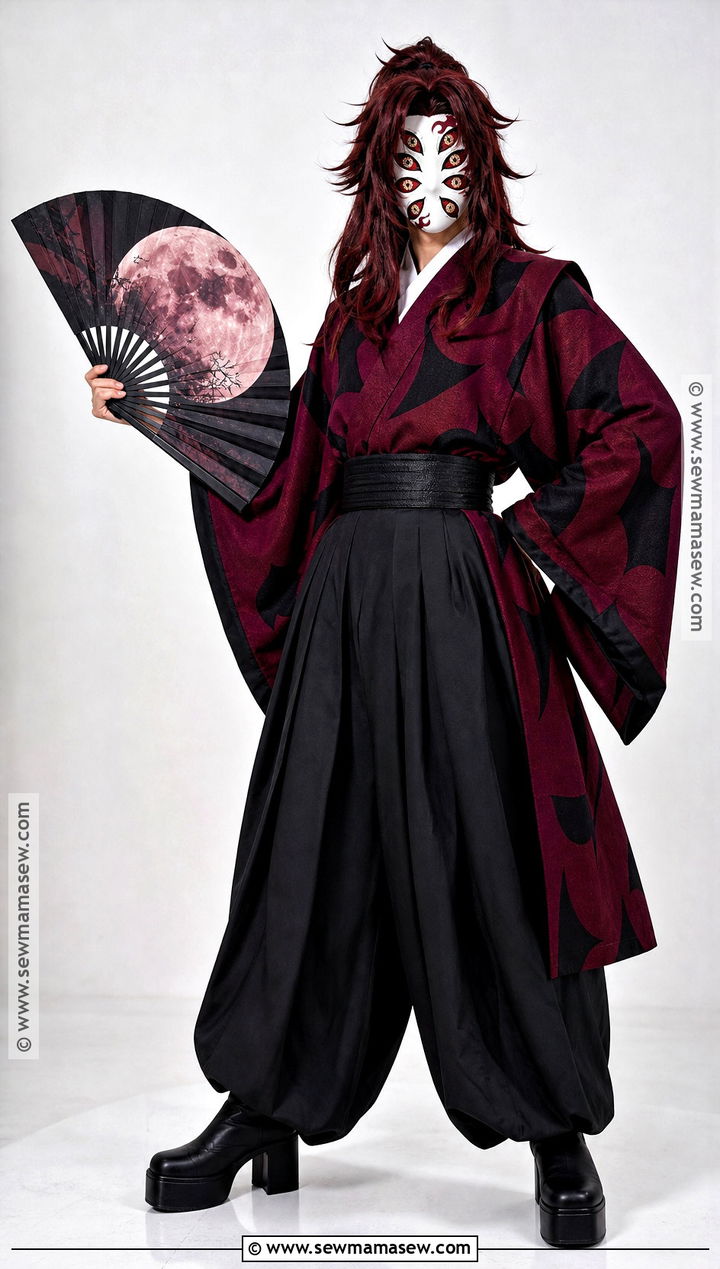
A full anime-style mask gives you the most graphic version, with exaggerated eyes and smooth illustrated features. Coordinate it with a structured burgundy kimono, bold black patterning and voluminous hakama. Discreet shoulder pads under the robe build the commanding silhouette without turning it into armour. The wig should be thick and dark burgundy, with waves separated by hand so they don't clump into one sheet. Since the mask covers the face, I keep the visible neck pale with a little red shading at the collar, because a bare neck under a white mask looks unfinished. Platform boots hidden under the trousers add height if they're stable. Test visibility, airflow and fastenings at home first; full masks get hot fast.
10. Genderbend Kokushibo Cosplay
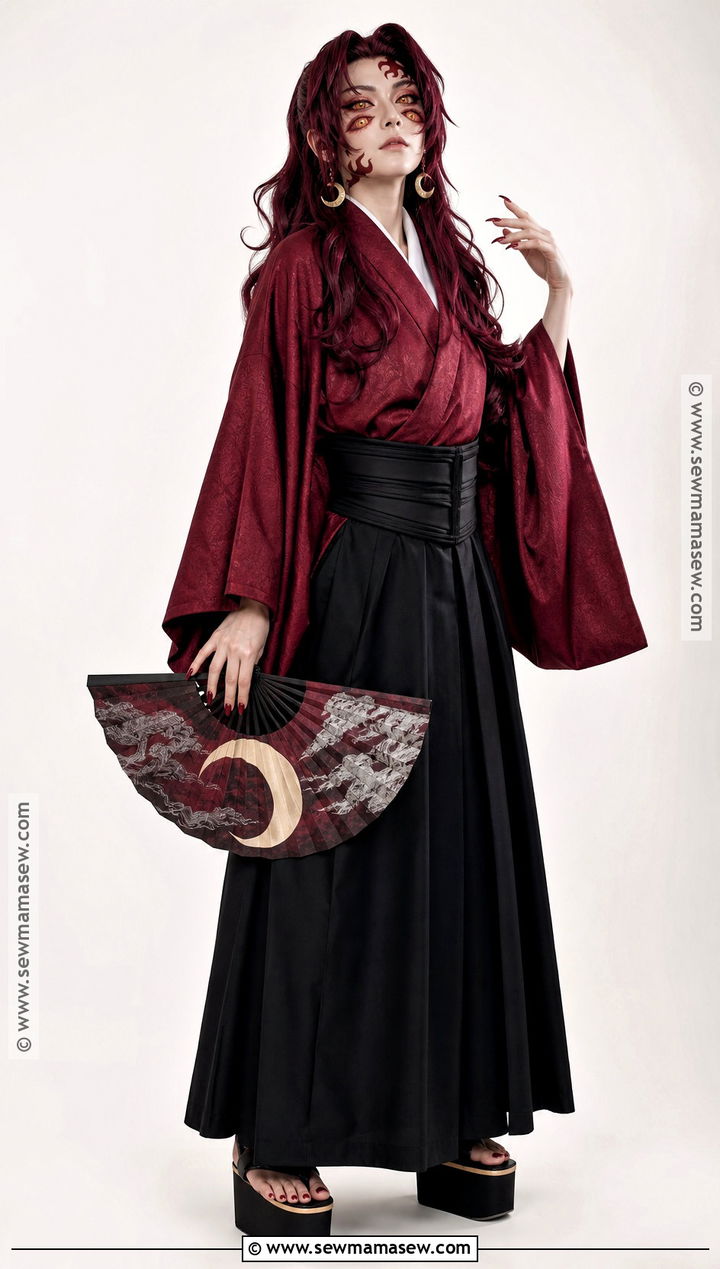
A genderbend take can change the silhouette while keeping every colour and supernatural detail intact. A fitted burgundy wrap top with wide sleeves goes over a floor-length black hakama skirt, and a broad black corset-style obi defines the waist. Keep that obi comfortable rather than tightly laced; you'll be standing in it for hours. A waist-length burgundy wig with two face-framing strands, pale foundation, deep red shadow, defined brows, the markings and four printed appliqués give the expression. Block-heel boots or platform sandals add height without wobbling. Moon earrings, pointed burgundy nail covers and a black fan with silver crescents keep it tied to the original design.
11. Female Kokushibo Cosplay
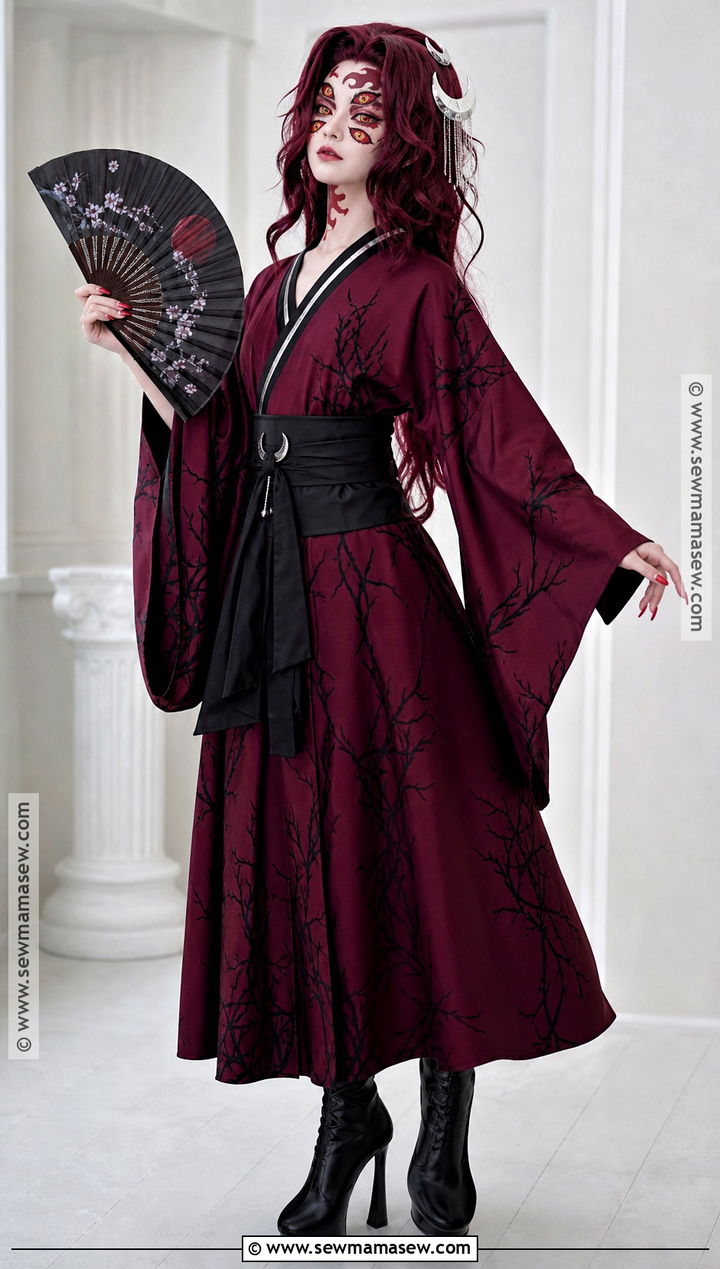
This feminine version swaps the hakama for a burgundy kimono dress with black branch patterns, long sleeves and an ankle-length skirt. I add a short black underskirt beneath it, because wrap skirts open at the front with every long stride. A wide black obi shapes the waist. Pin the front sections of a long plum wig back from the eye makeup, or they'll stick to the adhesive by midday. Pale matte foundation, burgundy contour, red markings and lightweight appliqués handle the face, and a dark red lip adds definition without softening his intensity. Knee-high boots under the skirt are far more forgiving than sandals. Silver moon hairpins and a lacquered fan finish it.
12. Male Kokushibo Cosplay
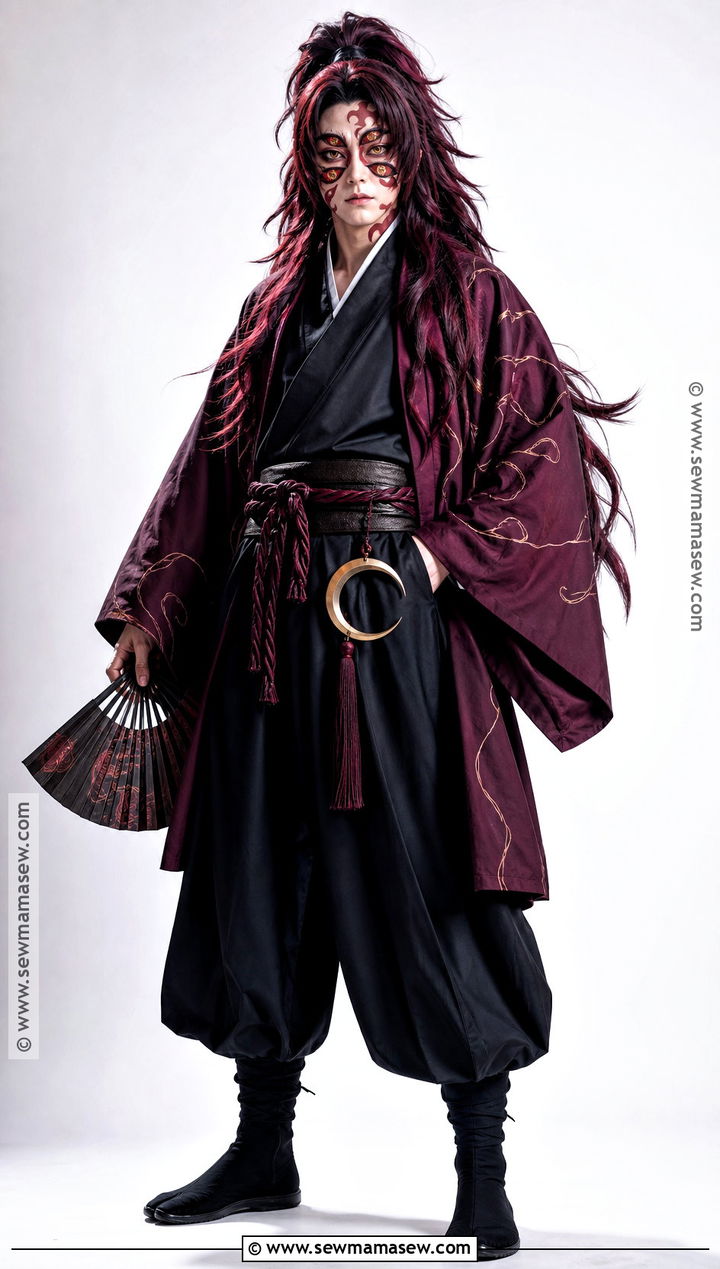
For a broader, masculine version, structure matters more than accessories. A maroon kimono jacket with pronounced shoulders goes over a black wrap shirt and roomy hakama, tied with a thick obi. If the hakama keeps creeping down, hidden suspenders solve it in minutes. Choose a wig with dense fibres so the hair balances the width of the costume; a thin wig on a wide frame looks sparse. Centre part, light waves and as little shine as you can manage. Matte pale foundation, cool contour under the cheekbones, strong brows, the markings and four extra eye appliqués build the face. Tabi boots keep the traditional shape with more protection than sandals, and a moon medallion at the obi plus a dark fan add the theme. Stand tall in photos; he never slouches.
13. Plus Size Kokushibo Cosplay
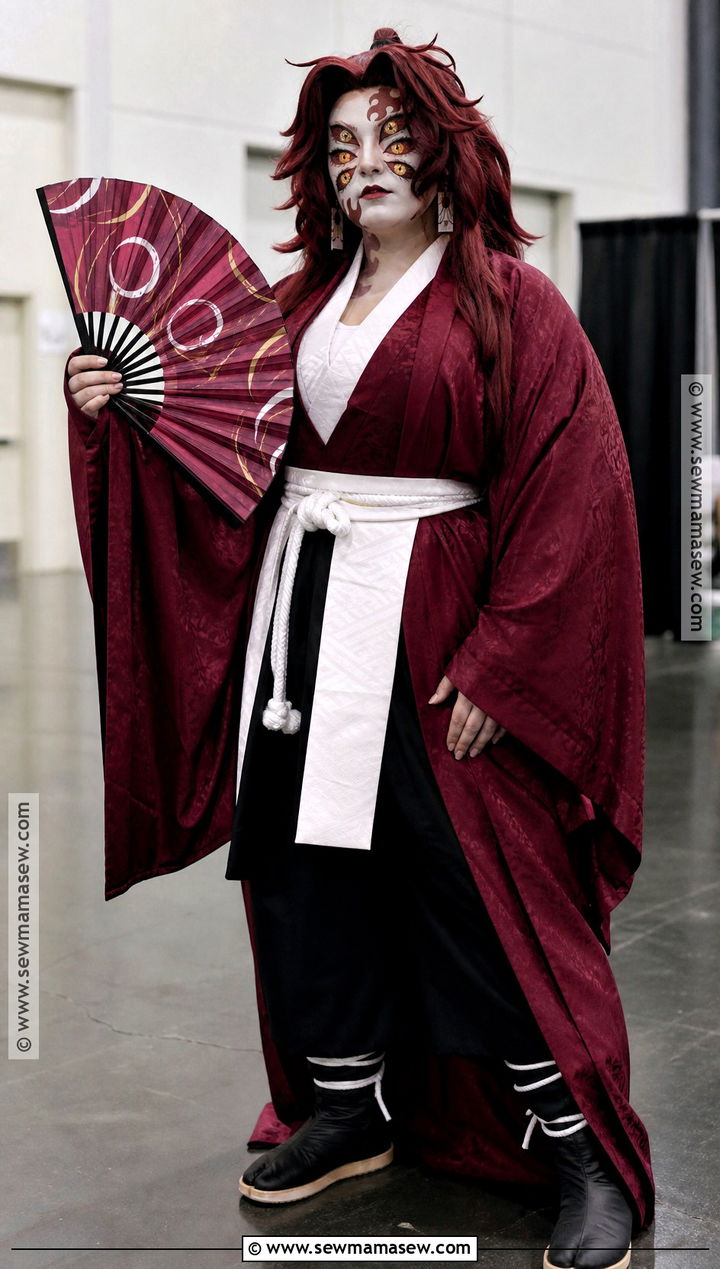
On a plus size build, the mistake I see most is sizing the whole costume loose to be safe, which loses his sharp shape. Tailor for movement instead: a burgundy kimono with generous sleeves, side ties and enough room across the shoulders, wide black trousers with an elastic or adjustable waist, and a supportive black undershirt. A structured obi with hidden elastic defines the waist and still lets you breathe. Go for a thick burgundy wig past the shoulders with longer side pieces framing the face. Pale foundation, soft contour, the red markings and light appliqués keep the familiar face. Cushioned boots, crescent earrings and a broad fan suit the proportions. I reinforce the underarm and crotch seams before wearing, and I carry fashion tape for the wrap front.
14. Casual Kokushibo Cosplay
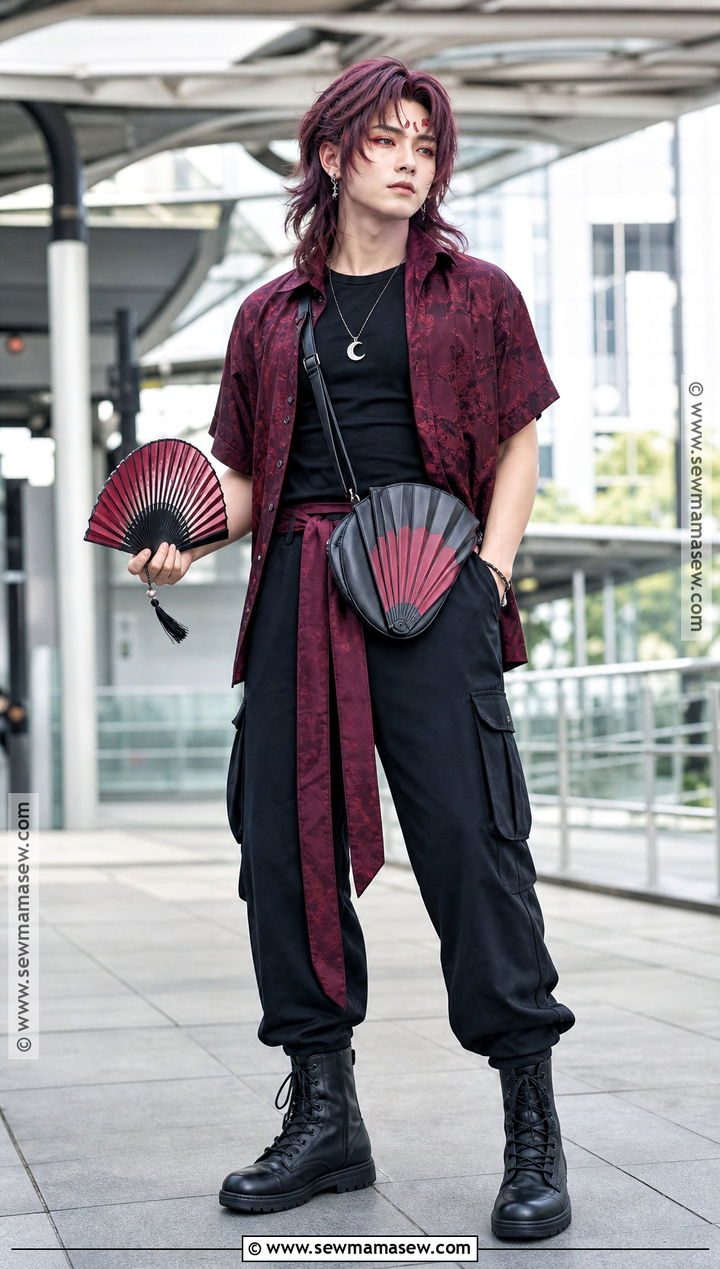
Casual Kokushibo is what I'd wear on a travel day or to a low-key meetup. A burgundy patterned overshirt open over a black tee, loose black cargo pants and combat-style boots carry the palette, and a slim black sash pulls the overshirt into a kimono-like shape when you want more character. A shoulder-length plum wig moves much more easily than a floor-length one. Keep your own complexion, then add red graphic liner, angular brows and small eye decals above and below your eyes. A crescent necklace and a fan-shaped crossbody bag are subtle nods. It packs into a carry-on with room to spare.
15. Modern Kokushibo Streetwear Cosplay
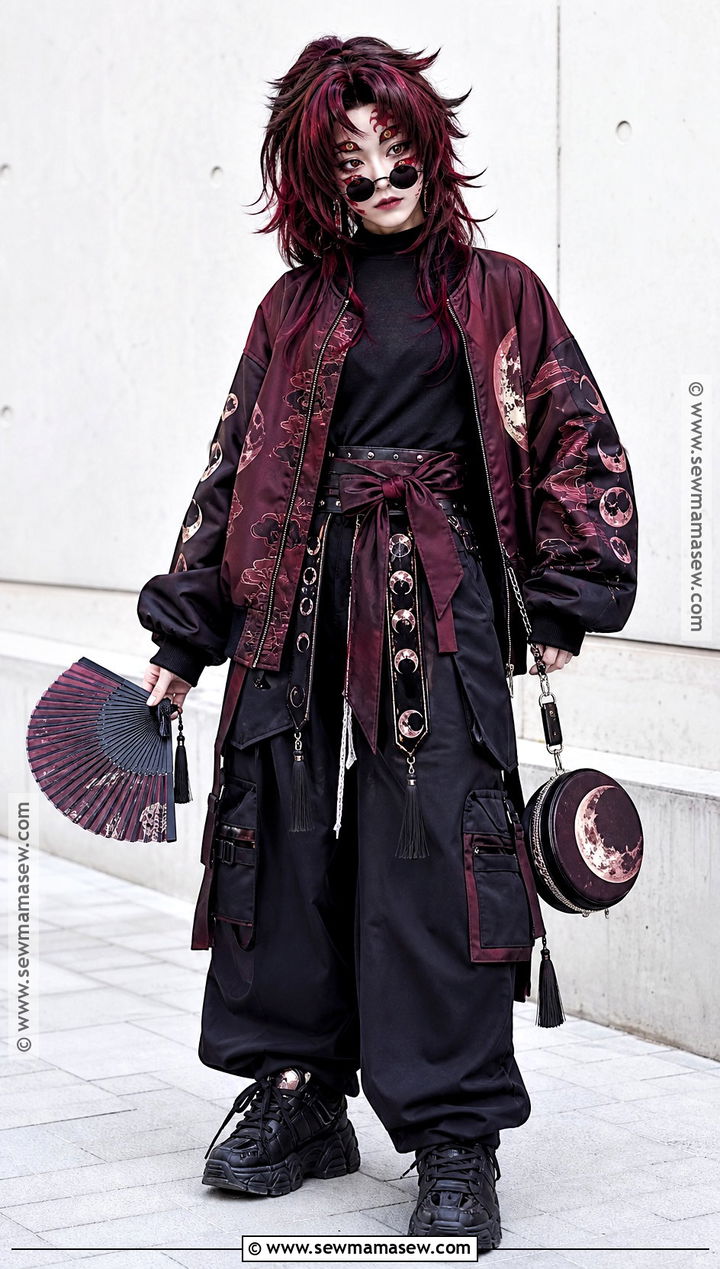
Streetwear Kokushibo hangs on one piece: an oversized burgundy bomber printed with black abstract branches. Wear it over a fitted black mock neck, wide cargo pants and chunky black sneakers, and add a wide utility belt to echo the obi. The bomber's ribbed waist does a lot of the work a sash would. Long burgundy waves or a layered shoulder-length cut both work here; the shorter one looks more modern. Go light on the pale base, then add sharp red liner, the markings and four graphic eye stickers. Moon-shaped sunglasses can sit on top of the head, as long as they don't cover the design. A crescent crossbody bag and a fan clipped to the belt finish it, and it photographs well against concrete and city backdrops.
16. Elegant Kokushibo Formal Cosplay
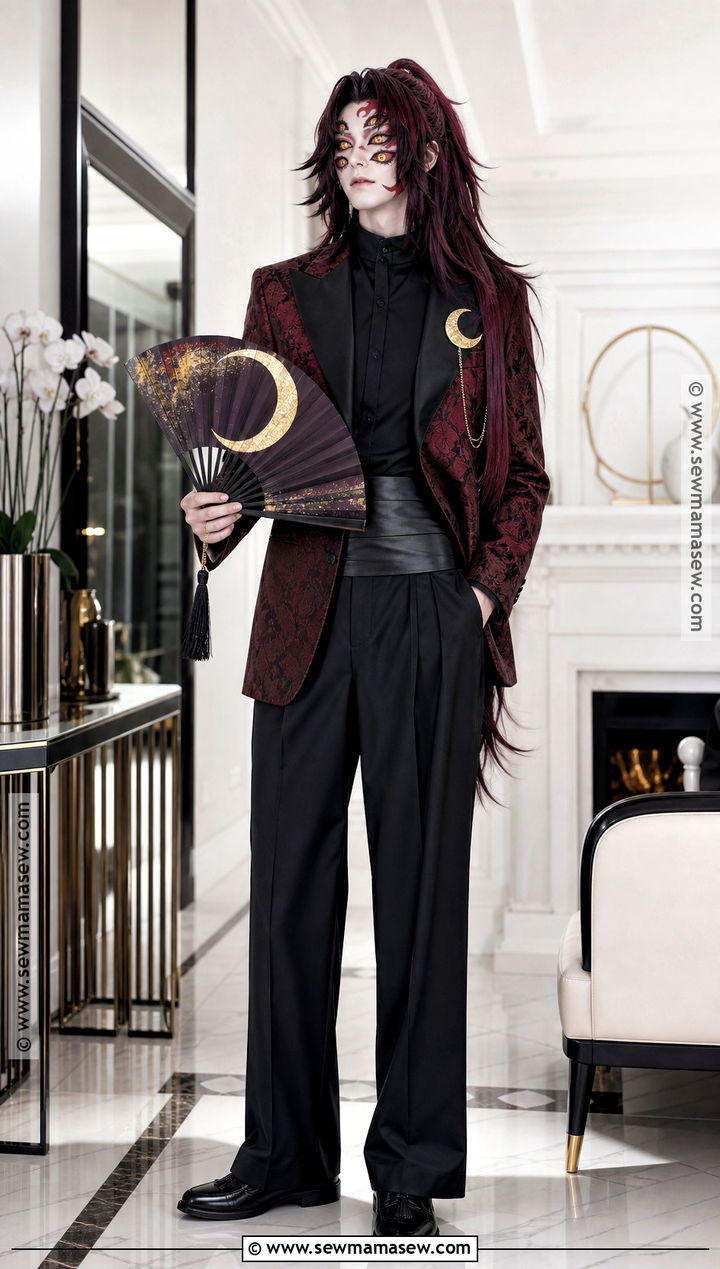
Formal tailoring is a clever way to wear him to an evening costume event. A burgundy brocade blazer with subtle black branches over a black high-neck shirt, wide tailored trousers, polished loafers and a satin cummerbund in place of the obi make the base. Brocade frays fast, so if you're altering the blazer, finish the cut edges before anything else. A sleek waist-length plum wig with a precise centre part keeps the hair as tidy as the suit. Pale satin-finish foundation, sculpted contour, fine red markings and carefully aligned appliqués suit the polish of the outfit. A crescent lapel brooch and a black silk fan with burgundy moons replace a conventional prop. Check that you can sit down comfortably in the trousers; formal events involve a lot of chairs.
17. Royal Kokushibo Cosplay
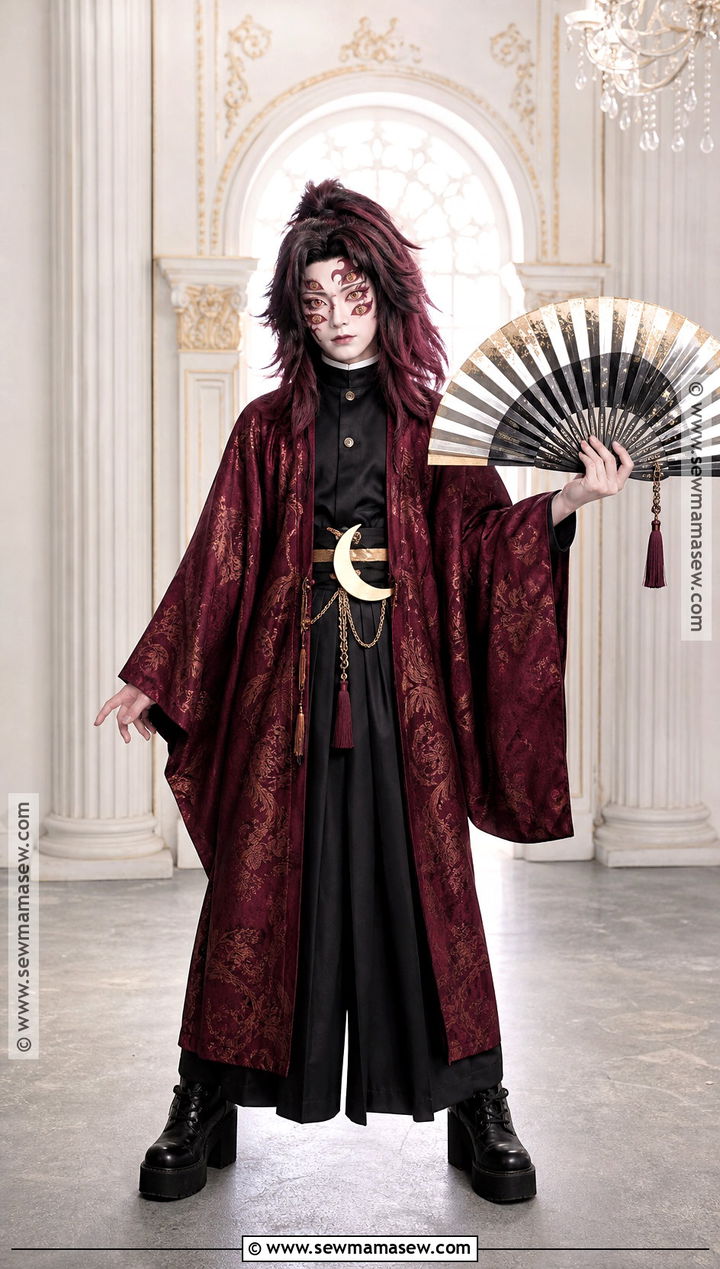
Rich textures turn him regal without losing the face or hair. I'd choose a floor-length burgundy kimono coat in jacquard or brocade over black hakama and a high-collar shirt, then add a black-and-gold obi with a large crescent ornament at the centre. Heavy coat fabric pulls a wig backward, so secure the wig with extra pins at the crown. The hair itself should be thick, waist-length and blended with burgundy, black and a hint of violet. Pale foundation, deep contour, red lines and symmetrical appliqués keep the face consistent. A slim crescent headpiece reads better than a crown because it stays on the moon motif. Platform boots add height under the coat, and a large fan with metallic moons balances the scale. Save this one for indoor shoots; the hem drags outdoors.
18. Samurai Inspired Kokushibo Cosplay
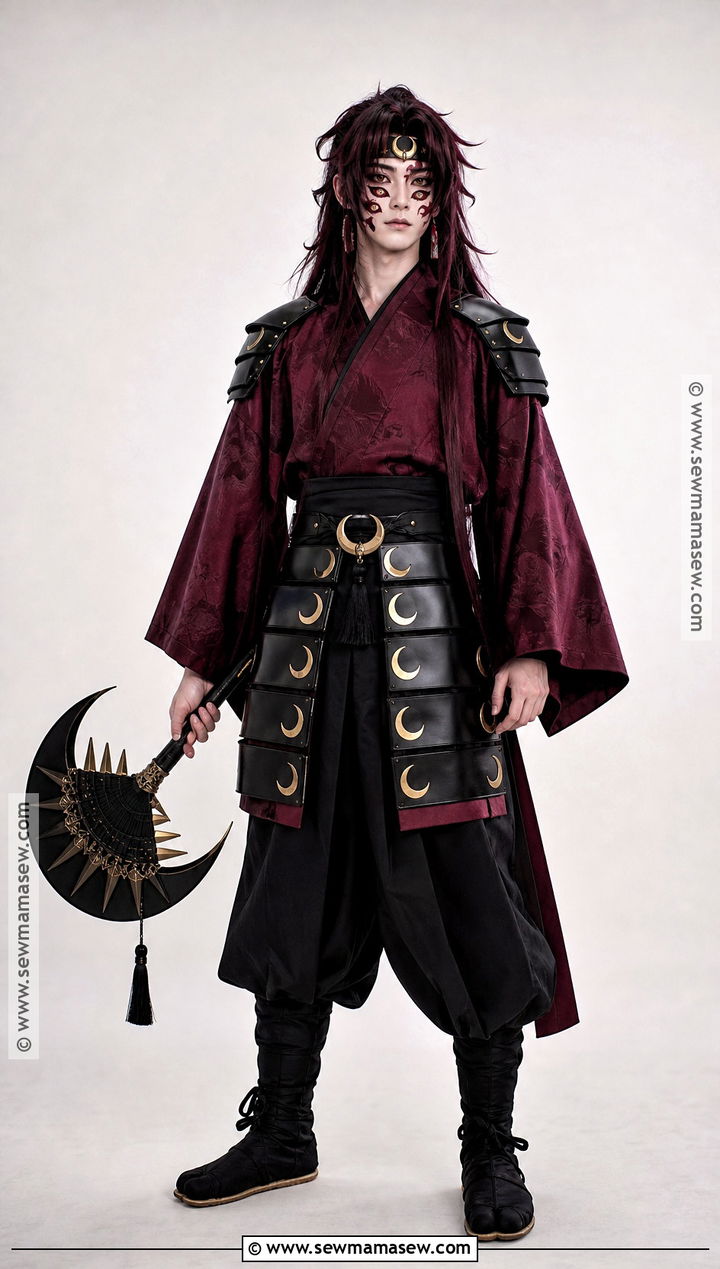
Samurai-inspired Kokushibo uses safe costume armour and no blade at all. Layer a dark maroon kimono over black hakama, then add lightweight foam shoulder guards and a segmented waist panel. EVA foam is the right choice: it heat-shapes into curves, but it needs a sealer before paint or the colour soaks in unevenly, which is why I prime before adding burgundy crescent motifs and a satin finish. A narrow decorative headband holds a long black-and-plum wig in place. Pale makeup, strong brows, red markings and the six-eye appliqués keep the supernatural face. Cloth boots with wrapped ankles ground the look. A crescent crest on the obi and a foam war fan stand in for the sword, which keeps you clear of strict prop policies.
19. Moon Armor Kokushibo Cosplay
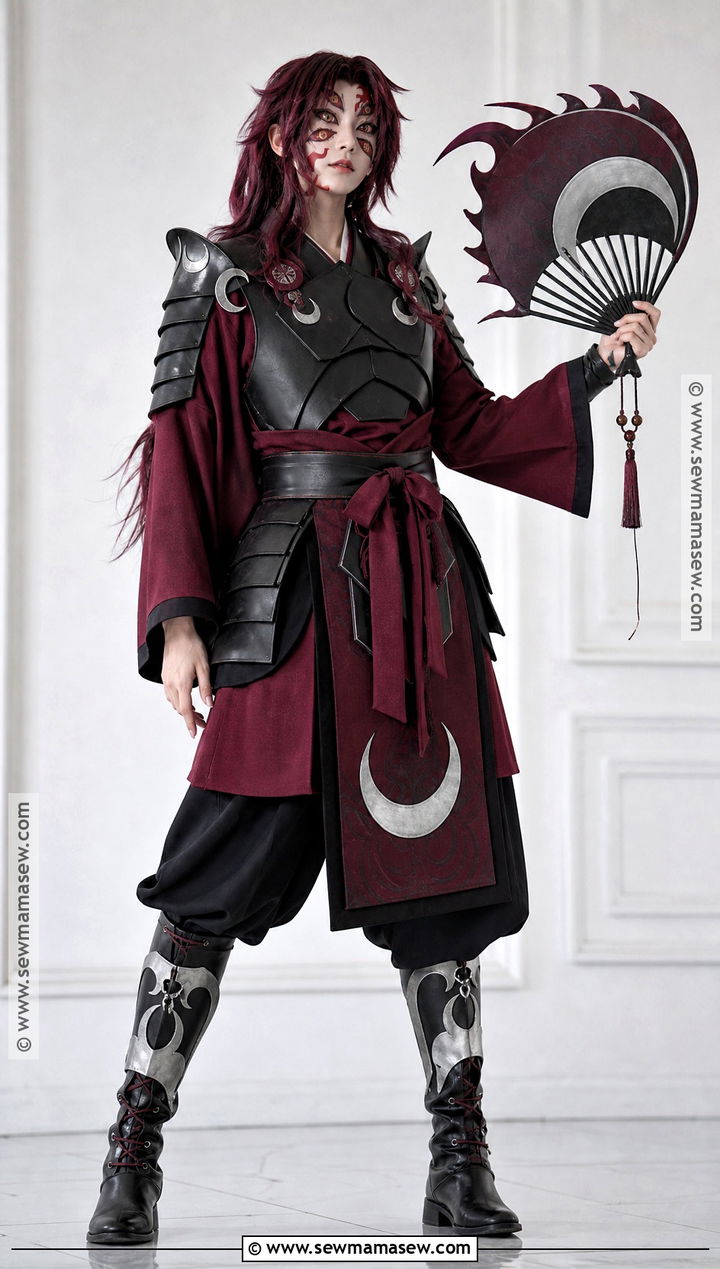
Moon armour adds fantasy structure, and it only works if you can still move. A fitted burgundy tunic and loose black pants form the base, with flexible foam chest and shoulder pieces on top. Round every panel edge; sharp corners catch on crowds and on your own sleeves. Paint them black with silver crescent accents, and add a divided burgundy overskirt behind the obi to bring back the flowing kimono line. Let the plum wig fall in long waves around the armour. Pale foundation, red contour, the markings and printed appliqués complete the face, while knee-high boots with foam shin covers balance the top half. Before the event, sit down, climb a few stairs and raise both arms over your head in it. If any piece pinches, cut a relief notch now.
20. Crimson Kokushibo Cosplay
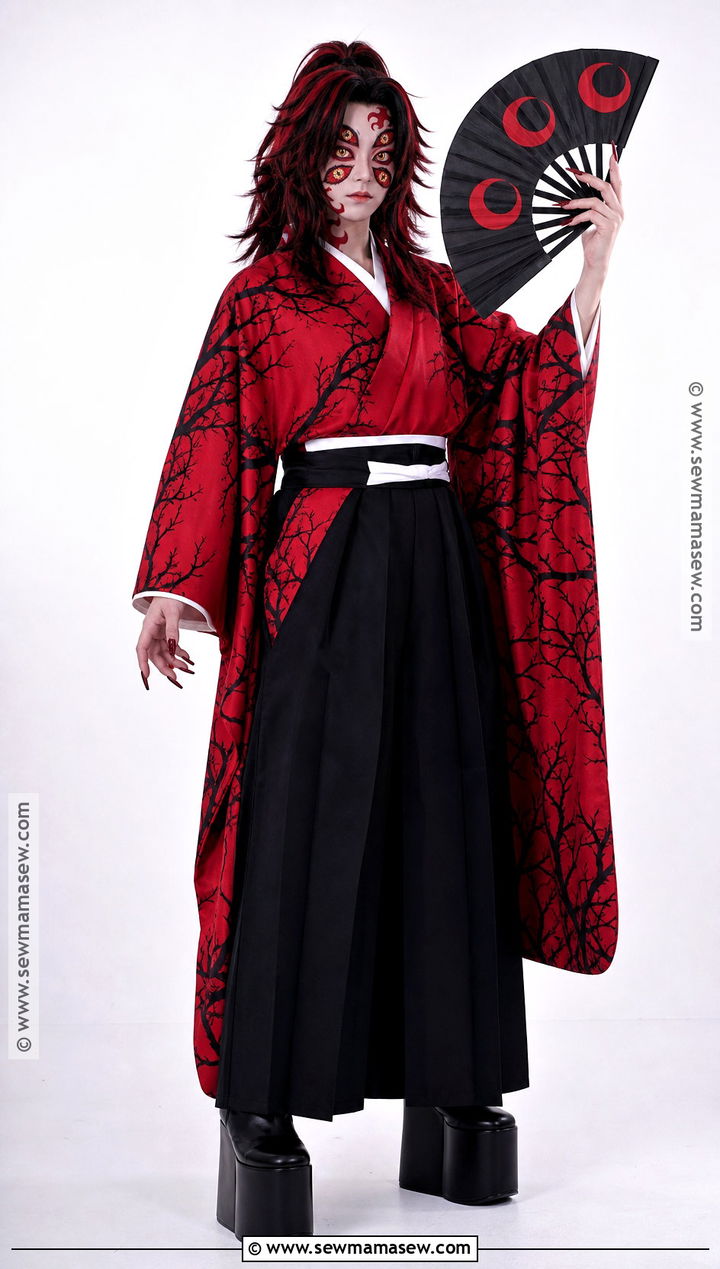
Pushing the reds up to crimson gives the most vivid photos. A bright crimson kimono with matte black branching goes over hakama and a fitted black undershirt, with a black obi piped in dark red so the waist stays defined. A wine-red wig with black lowlights adds depth that a flat red wig can't. Use a pale base, crimson liner, red markings and four matching appliqués, and keep the lips neutral so the eyes stay dominant. Saturated red fabric often bleeds when it's wet, so I'd wash the robe alone before wearing it over anything light. Black platform boots ground the colour, crimson nail covers carry it into the hands, and a matte black fan with red crescents ties it together. Shoot this one against white or pale grey.
21. Purple Kokushibo Cosplay
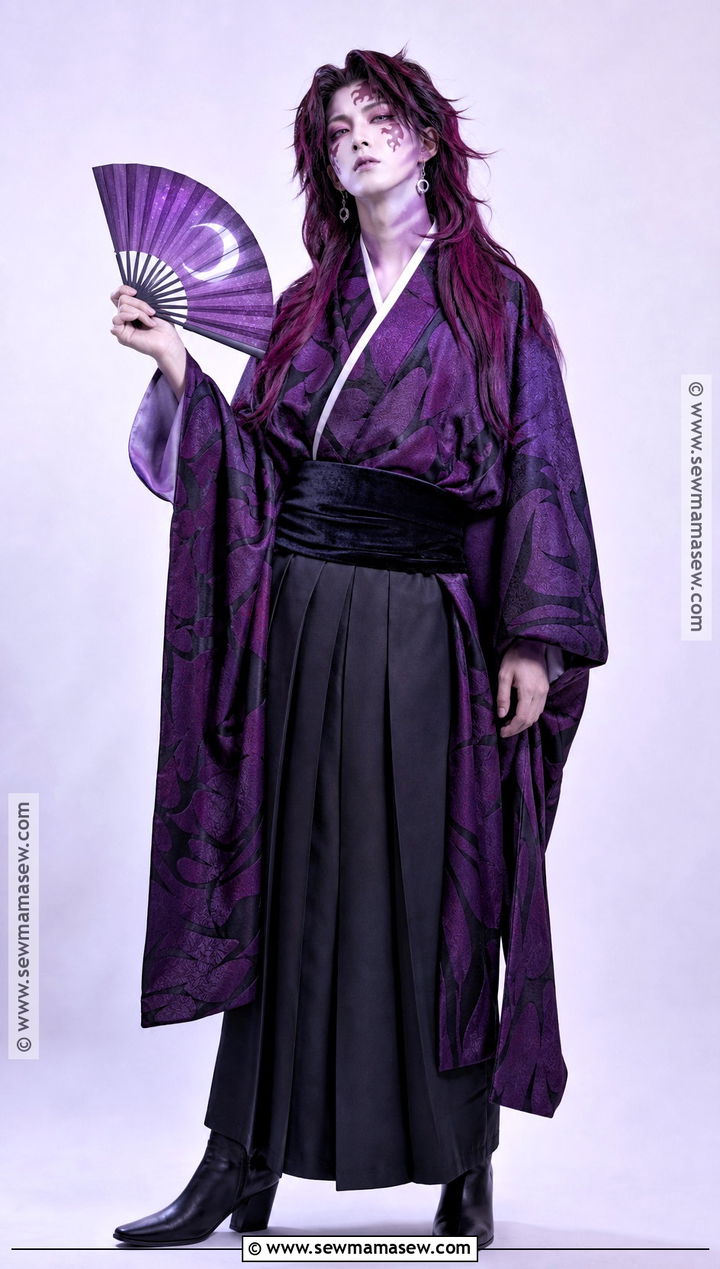
Purple leans into his cooler side and still keeps the layered shape. Choose a deep aubergine kimono with black organic patterns over flowing charcoal hakama, and add a black velvet obi for texture rather than another colour. Velvet shows every crease, so steam it rather than ironing it flat. A waist-length wig blending plum, violet and black, with a crisp centre part, keeps the hair in the same family. Pale foundation with lavender contour under the cheekbones looks colder than brown contour would. Red-purple markings, appliqués with magenta irises, black ankle boots, amethyst-coloured moon earrings and a violet crescent fan finish it. Fans still know him from the face, hair and silhouette.
22. Winter Kokushibo Cosplay
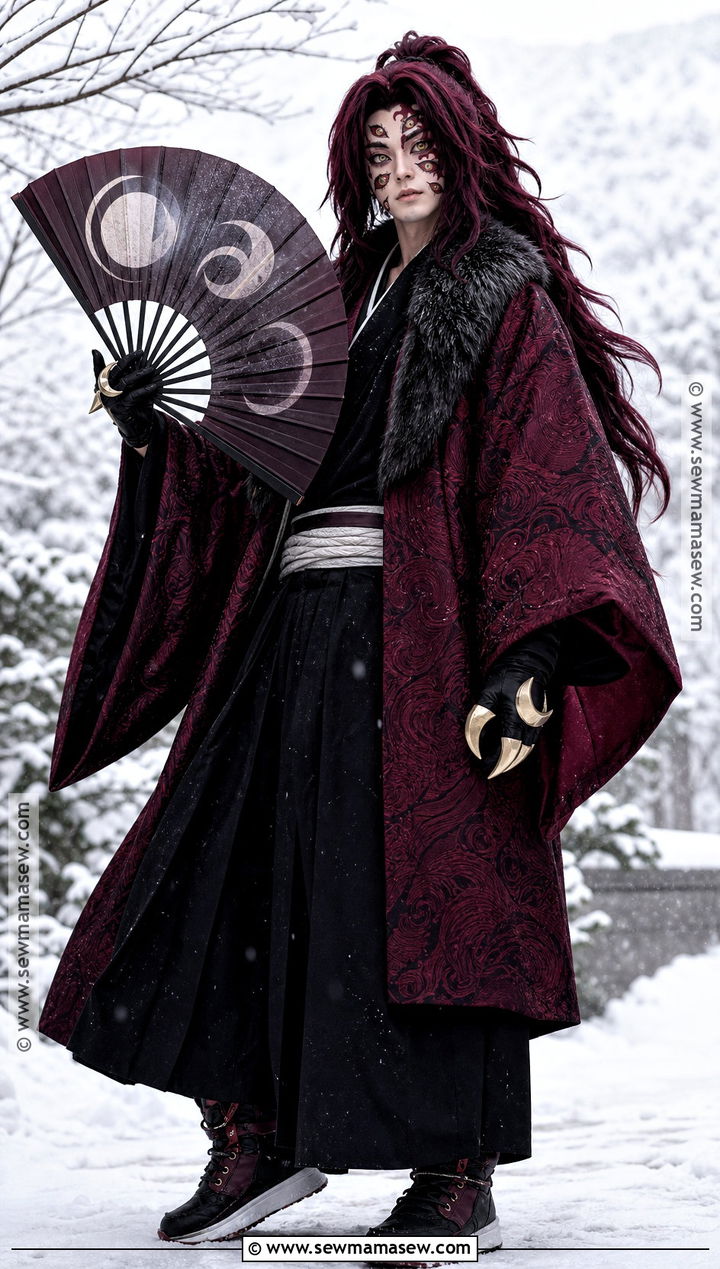
Cold events need warmth hidden under the drama, and his layered robe is generous enough to hide a lot. I start with thermal black leggings, a fitted mock-neck top and insulated boots, then add wide hakama and a heavy burgundy kimono coat with black moon-branch patterns, shaped by a thick obi. A dense wig doubles as a scarf across the shoulders; a black headband keeps it anchored in wind. Pick flexible appliqués, since stiff ones can lift at the edges in cold air. Black gloves with small silver crescents and a detachable charcoal faux-fur collar add warmth with character. Hot glue lets go in the cold, so anything glued to the coat should be stitched as well.
23. Summer Kokushibo Cosplay
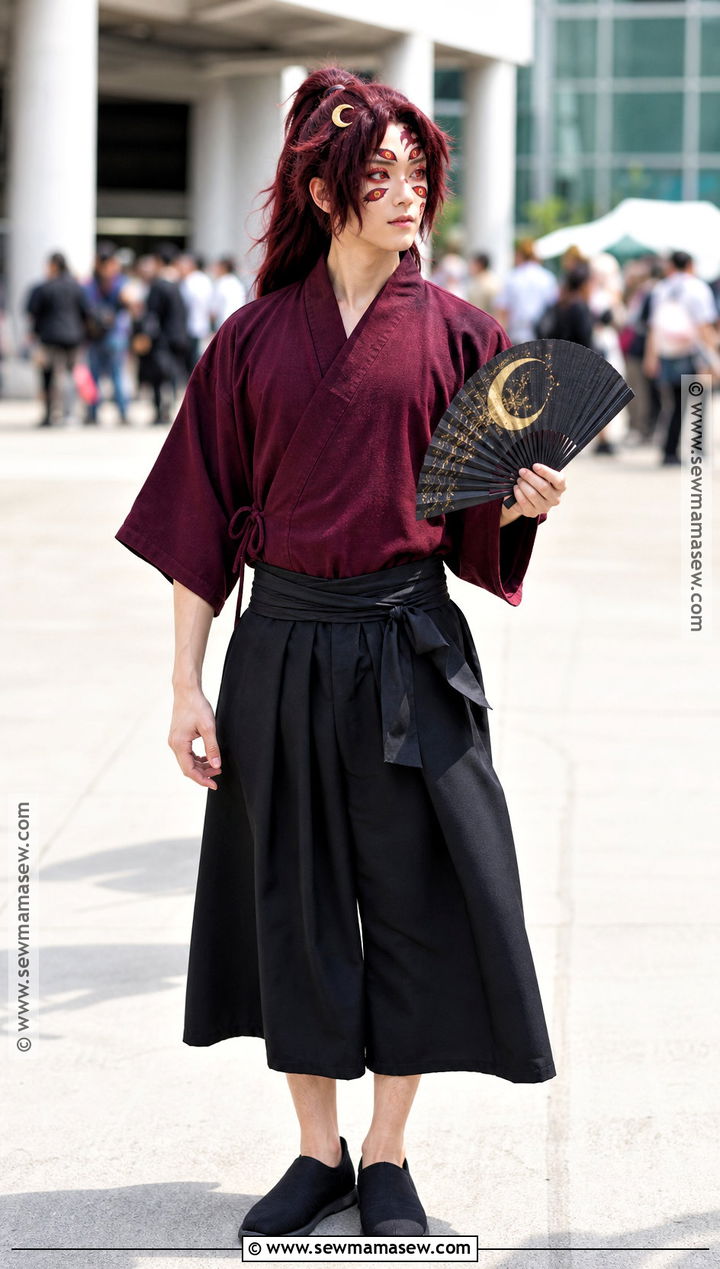
For warm conventions, fabric choice decides whether you last the afternoon. Swap heavy polyester for cotton, rayon or linen blends: a lightweight burgundy wrap top with elbow-length sleeves, black cropped hakama and a soft elastic obi that defines the waist without trapping heat. A medium-length layered wig, or a long one tied loosely at the nape, keeps fibres off a sweaty neck. Lightweight foundation, waterproof red liner and thin printed appliqués hold up better than heavy layers, especially once set with translucent powder and setting spray. Breathable slip-ons with cushioned insoles beat boots in the heat. A crescent hair clip and a working fan with burgundy moons finish it, and you'll actually use that fan.
24. Chibi Kokushibo Cosplay
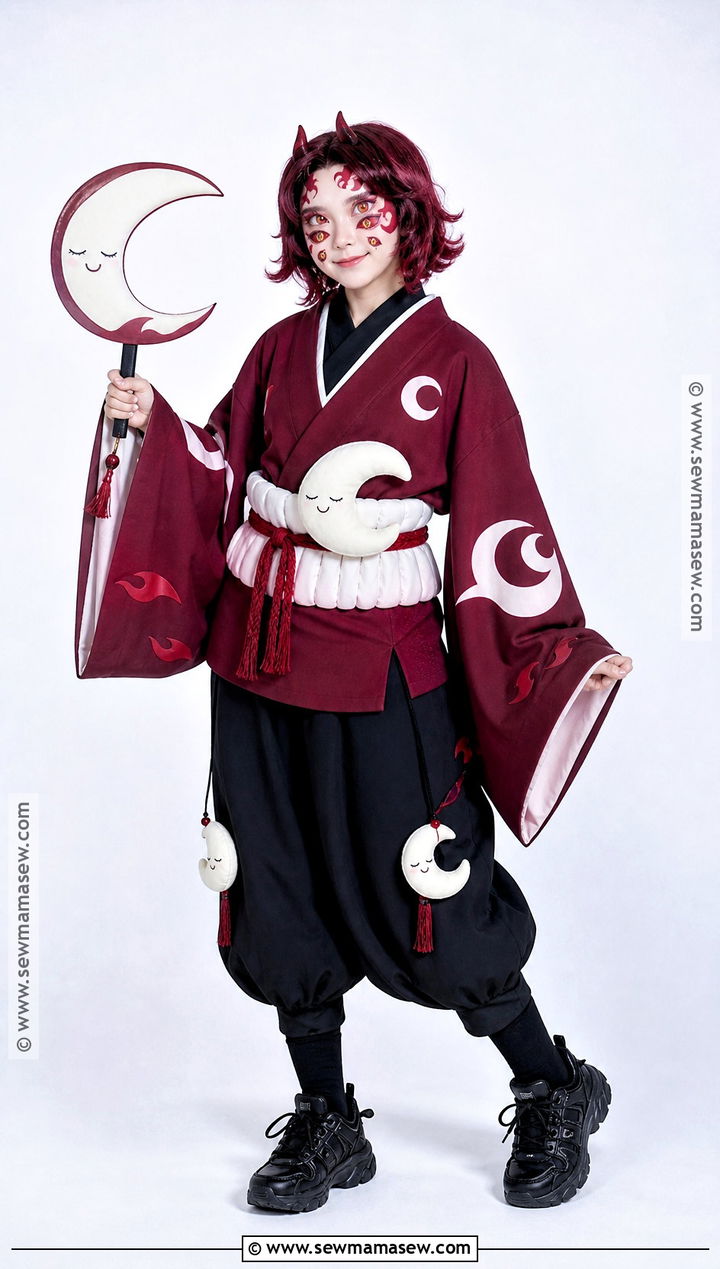
Chibi softens him with round shapes and playful proportions. A short burgundy kimono jacket with oversized sleeves, black balloon pants and a wide padded obi make a compact shape, and chunky boots or sneakers exaggerate it. A thick burgundy bob with curled ends works well; tucking a long wig into a low bundle also works but gets heavy. Use a natural pale base, rounded brows, rosy contour and large illustrated eye appliqués, and keep the markings smooth rather than sharp. Crescent clips, plush moons on the belt and a small smiling-crescent fan keep it cheerful. This is the version I'd point families toward.
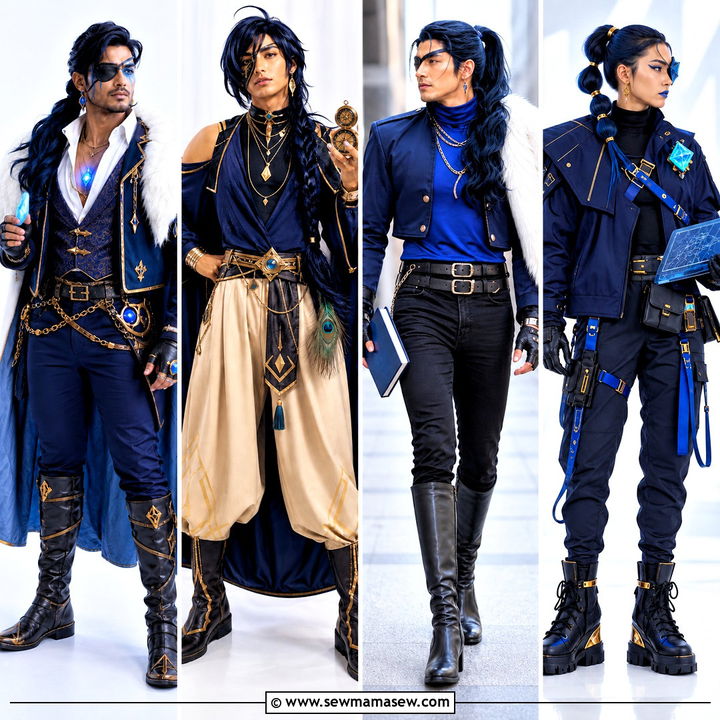
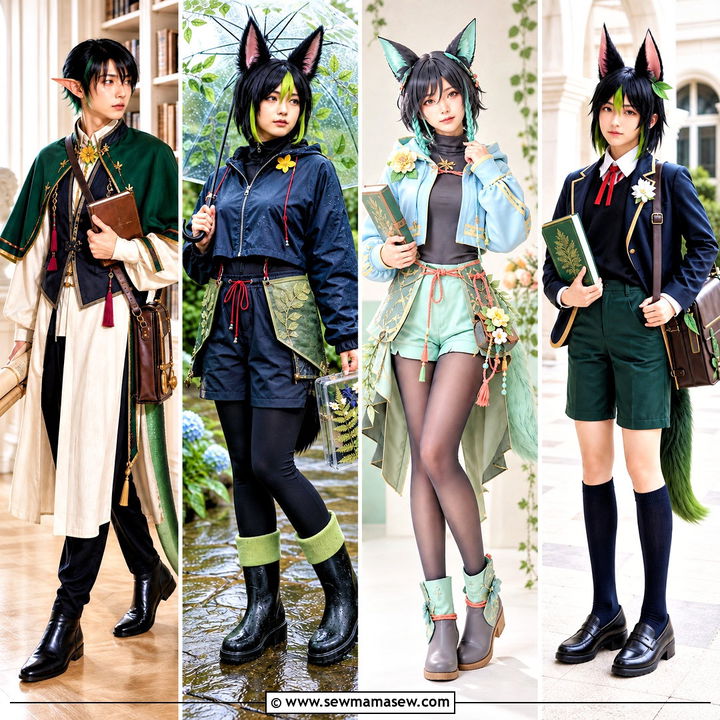
25. Cute Kokushibo Cosplay
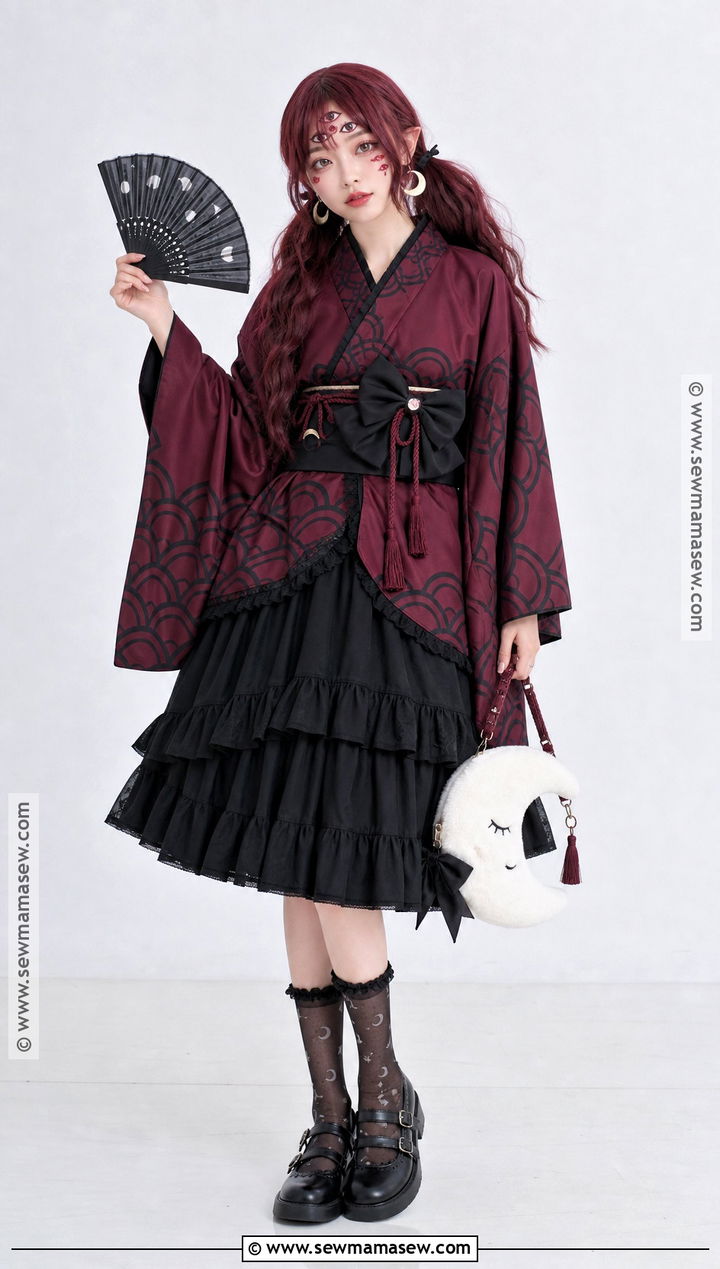
Cute Kokushibo keeps the maroon palette and softens the textures. A burgundy kimono top with scalloped black patterns pairs with a layered black midi skirt or roomy pleated trousers, and a bow-shaped obi tied at the back changes the whole silhouette. Two low ponytails from a long plum wig keep the centre part and face-framing strands. When splitting a wig into pigtails, I add a few wefts of matching fibre at the parting if the cap shows through. Pale foundation, soft burgundy shadow, delicate markings and rounded appliqués go on the face, with black Mary Janes and moon-print socks underneath. Crescent earrings, a plush moon bag and a small fan finish this friendlier take on the hair, eyes and robe.
26. Gothic Kokushibo Cosplay
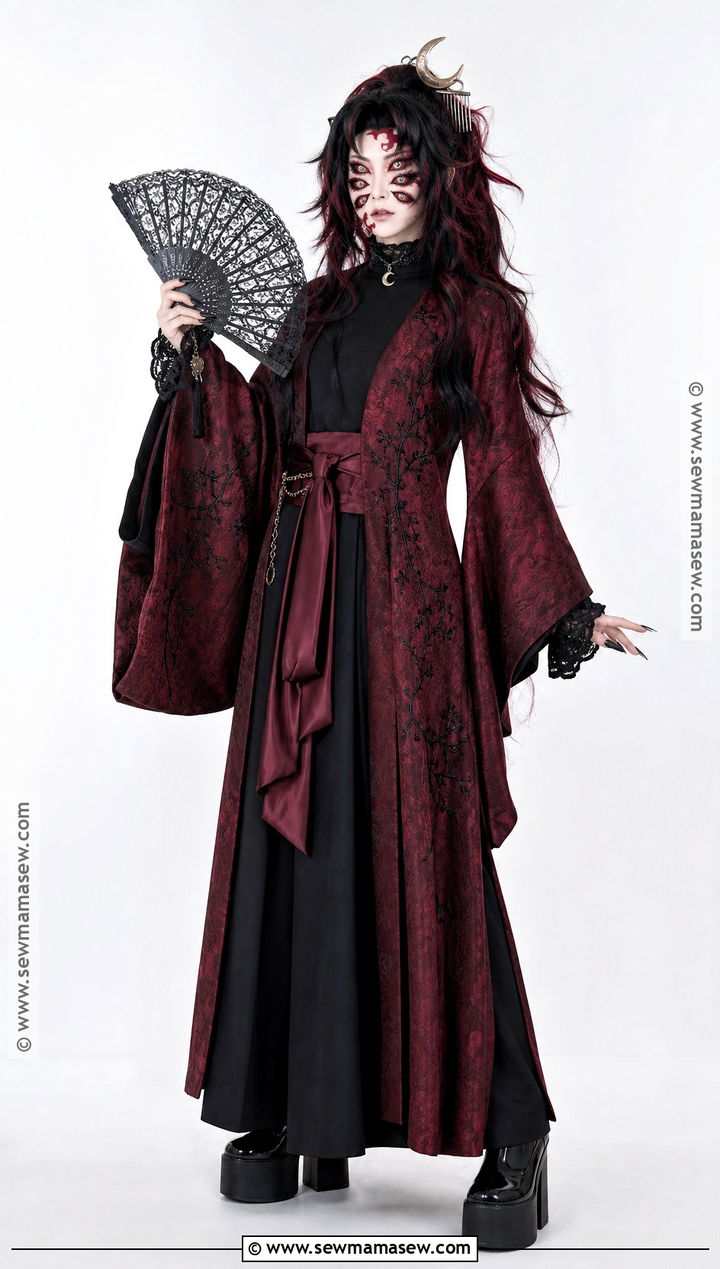
Gothic Kokushibo trades the kimono's flatness for lace and structure. A long burgundy brocade coat with kimono sleeves and black branch embroidery goes over a high-neck black shirt, wide black trousers and a structured satin obi, with lace cuffs at the wrists and platform boots beneath the hem. The wig should be extremely long, blending black and wine-red fibres. Pale matte makeup, deep burgundy shadow, the markings and symmetrical appliqués carry the face. Black lipstick is striking but bleeds and smudges onto cups and fans, so I usually suggest a muted plum that survives a night of drinks. A crescent choker, moon hair comb and black lace fan keep it fashion-led rather than frightening.
27. Cyberpunk Kokushibo Cosplay
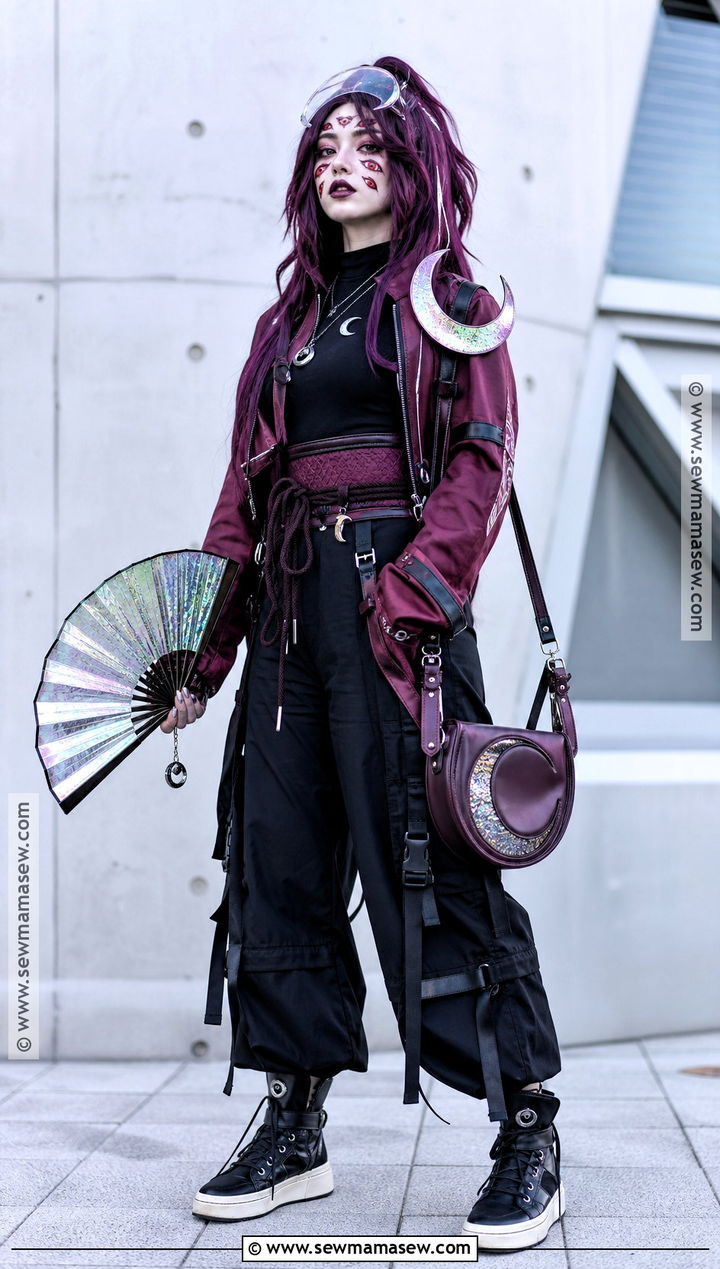
Cyberpunk puts him in reflective materials and sharp streetwear layers. A burgundy techwear jacket with an asymmetrical wrap front over a black compression shirt and wide utility pants gives the base, with a structured black belt for the obi and lightweight silver crescent panels at the shoulders. High-top sneakers keep convention floors manageable. Thread a few metallic strands or removable reflective extensions through a long plum wig, but keep them sparse so the hair still reads as his. Pale makeup, geometric red markings and six graphic eye decals outlined in silver liner give the futuristic face. A translucent visor above the forehead, a crescent crossbody bag and an iridescent fan add the sci-fi finish.
28. Steampunk Kokushibo Cosplay
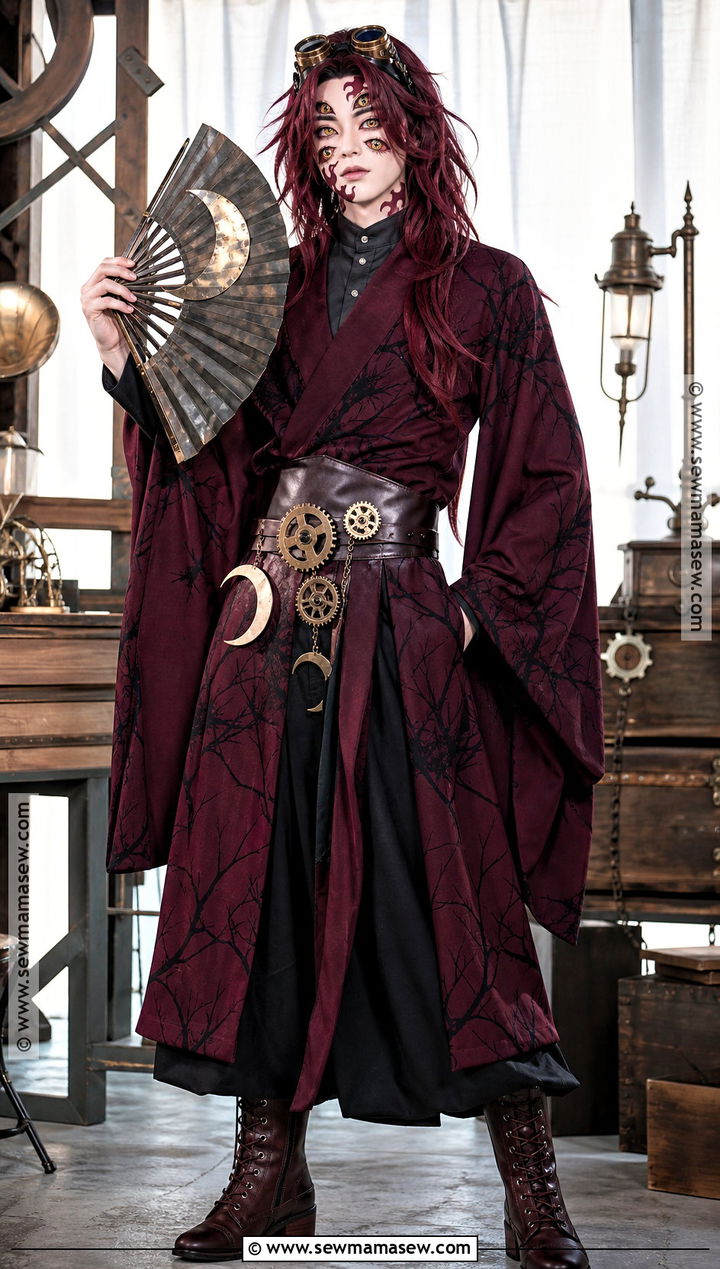
Steampunk only works when the gears stay smaller than the kimono. A burgundy wrap coat with black branches goes over a dark high-collar shirt and wide trousers, and a brown-black leather-look obi carries the decorative gears and crescent ornaments. Faux leather can tear at stitch holes, so I glue and then stitch any hardware rather than relying on one or the other. Lace-up boots with a low heel keep you stable. One gear-shaped clip on the side of a long plum wig is enough. Pale foundation, red markings and appliqués ringed in fine metallic liner give the face, goggles rest on the head rather than over the eyes, and a fan with bronze ribs and painted moons finishes it.
29. Festival Kokushibo Cosplay
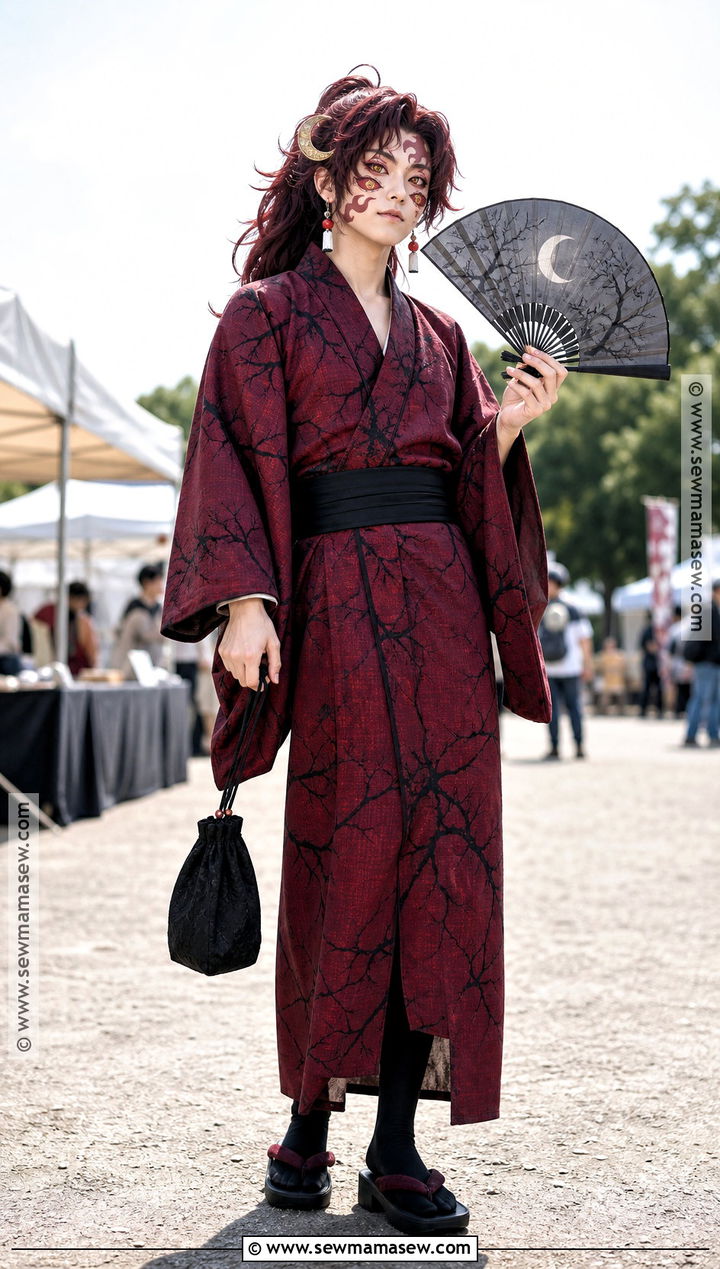
For outdoor festivals, I'd pick a lightweight maroon yukata with black branch patterns over short black leggings for coverage, tied with a wide black obi. A yukata breathes far better than a lined kimono in sun. Cushioned black sandals save your feet on grass and pavement. Tie part of a long burgundy wig back with crescent ornaments and leave the rest down. Pale foundation, red liner, the markings and four lightweight appliqués carry the face, and a small drawstring pouch at the waist holds essentials. A traditional fan painted with silver moons and burgundy clouds keeps him cool and in character.
30. Halloween Kokushibo Cosplay
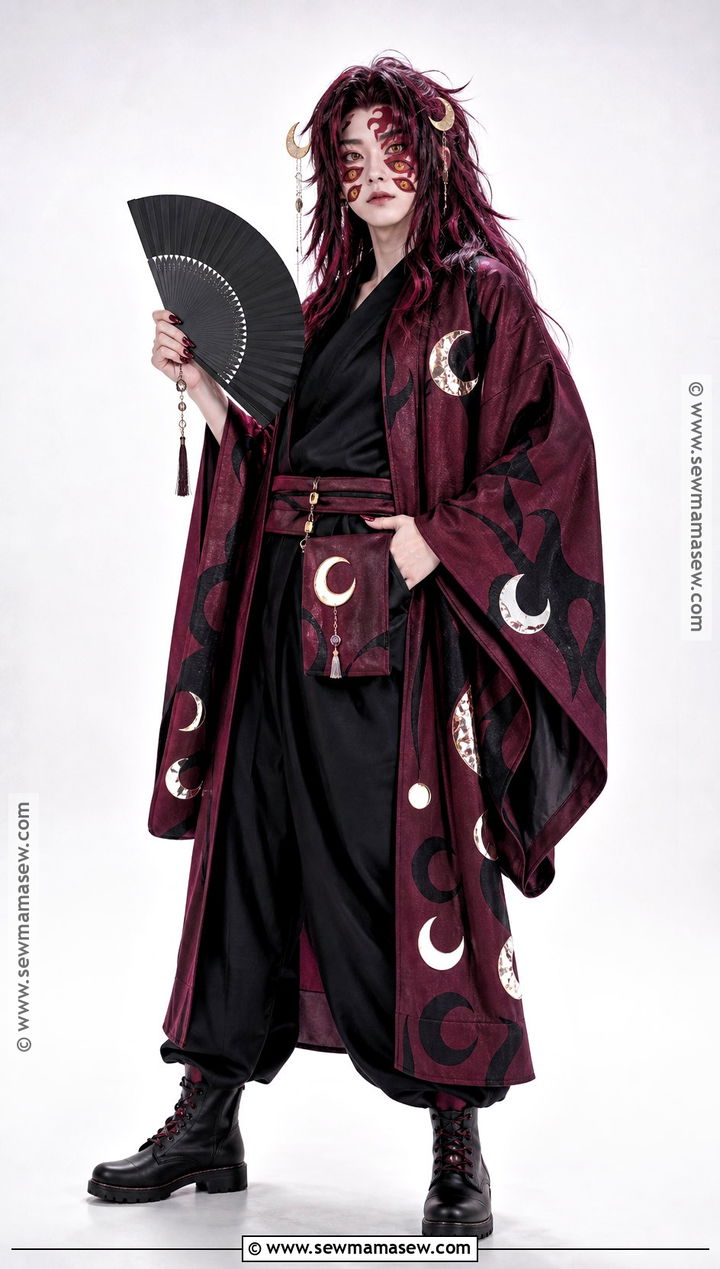
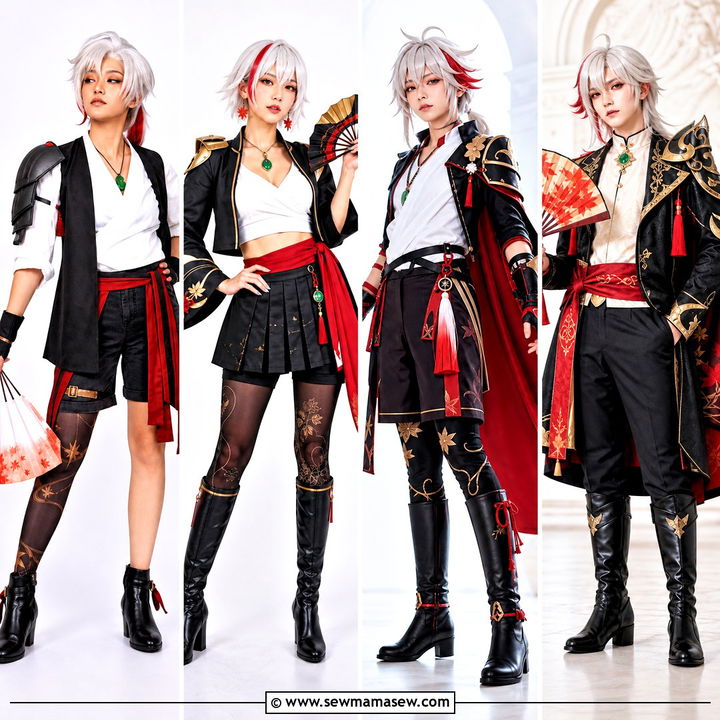
For Halloween night, comfort decides how long you'll stay out. A dark burgundy kimono coat with bold black patterns goes over a breathable black shirt and loose pants, and I sew a hidden pocket into the obi for a phone and keys, because kimono sleeves are a terrible place to keep anything. Supportive boots matter if there's any walking. Style a long plum wig in slightly tousled waves and pin it with concealed clips. Pale makeup, deep red shadow, graphic markings and removable six-eye appliqués carry the face; skip gore effects and let the extra eyes do the unsettling. Crescent ornaments, burgundy nail covers and a moon-print fan finish it, and reflective moon decals on the coat help drivers spot you after dark.
Wearing a Kimono-Style Robe for Hours
The detail I correct most often on Kokushibo cosplays is the wrap. The left panel goes over the right, so the overlap forms a lowercase y when someone looks at you. Right over left is how a kimono is dressed for a funeral, and anyone who knows will notice it in your photos.
- Tie a thin cord around the waist under the obi first. It holds the wrap closed so the obi only has to look good.
- Safety-pin the obi to the robe at the back in two places; obis creep upward when you sit.
- Hold the sleeves when you eat, reach or use a railing. Wide sleeves sweep through food and catch on door handles.
- Lift the hakama slightly at the front on stairs, the same way you would a long skirt.
- Pack a small kit with safety pins, fashion tape, spare adhesive and a travel comb.
If the robe keeps falling open no matter what, the overlap is usually too narrow for your frame. Adding a strip of fabric to the inner front panel gives you more wrap and costs one short seam.
The Version I'd Sew Up First
If I were building one of these from scratch, I'd start with the anime-accurate robe or the DIY painted kimono, because once you own a good maroon robe and a heavy wig, almost every other version on this list is a restyle. A burgundy or plum robe, black lower layers, long textured hair, moon accents and carefully placed six-eye makeup are what make people say his name. Choose breathable fabric, supportive shoes and a wig that's pinned well, use skin-safe products, and carry a fan instead of a blade. Then wear the full costume at home for an hour, so the first time you find a loose obi or a lifting appliqué isn't in the middle of a crowd.
Related posts: